Olympus OM10 offers automated functions via advanced electronics‚ accepting interchangeable lenses‚ film winders‚ and flashes—a complete photographic system․
The manual is readily available as a PDF‚ showcasing its manual exposure control and optional adapter for enhanced photographic experiences․
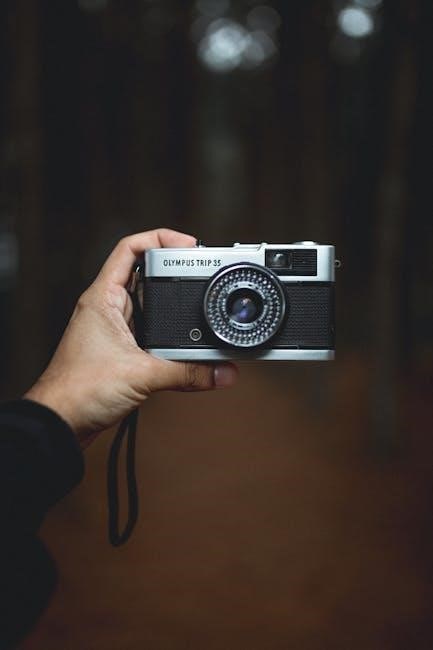
What is the Olympus OM10?
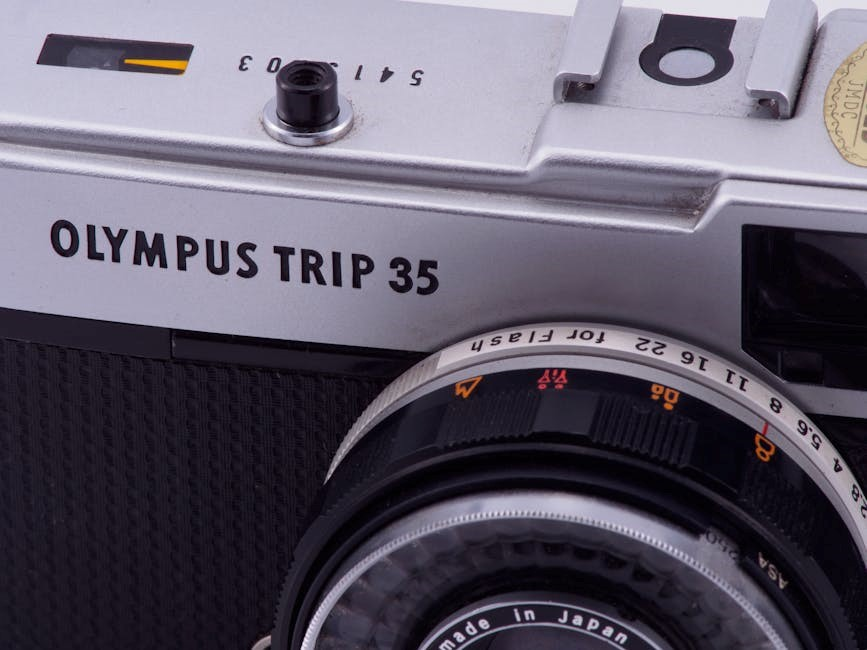
The Olympus OM10 is a 35mm single-lens reflex (SLR) camera‚ celebrated for its blend of manual control and automated convenience․ Introduced in the 1970s‚ it quickly gained popularity among photography enthusiasts due to its compact size‚ robust build quality‚ and exceptional image quality․ This camera represents a significant step in Olympus’s OM system‚ known for its lightweight yet durable bodies and a comprehensive range of compatible lenses․
At its core‚ the OM10 is designed to empower photographers with creative control․ While offering full manual operation‚ it also features an aperture-priority auto exposure mode‚ simplifying shooting in various lighting conditions; The availability of a downloadable PDF manual ensures users can fully understand and utilize its features․ A key component is the optional manual adapter‚ transforming the camera into a fully mechanical device‚ eliminating the need for batteries for basic operation․ It’s a camera built for both learning and achieving professional results․
Why Use an Olympus OM10 in 2025?
In 2025‚ the Olympus OM10 remains remarkably relevant for photographers seeking a tactile‚ engaging experience․ Its fully mechanical operation (with the manual adapter) offers a refreshing escape from modern digital complexities‚ fostering a deeper understanding of photographic principles․ The readily available PDF manual simplifies the learning curve‚ even for newcomers to film photography․
Beyond its educational value‚ the OM10 delivers stunning image quality thanks to the excellent Olympus lenses available․ It’s a cost-effective entry point into the world of film‚ offering a unique aesthetic that digital cameras often struggle to replicate․ Furthermore‚ the thriving online communities and forums provide ample support and inspiration․ Choosing the OM10 isn’t just about taking pictures; it’s about embracing a slower‚ more deliberate approach to photography‚ appreciating the craft‚ and creating timeless images․

Key Features and Specifications
The Olympus OM10 boasts a shutter speed range of 1 to 1/1000 sec‚ alongside manual exposure control‚ detailed in its PDF manual․
Shutter Speed Range
The Olympus OM10 provides a versatile shutter speed range‚ crucial for capturing diverse photographic scenes effectively․ As detailed within the Olympus OM10 manual‚ the camera offers speeds spanning from a slow 1 second‚ ideal for low-light conditions and motion blur‚ all the way to a swift 1/1000th of a second․
This rapid speed is perfect for freezing fast-action subjects and achieving sharp‚ clear images in bright daylight․ The manual clearly explains how to select these speeds‚ allowing photographers to precisely control the amount of light reaching the film․ Understanding this range is fundamental to mastering exposure and achieving desired creative effects․ The PDF manual provides detailed illustrations and explanations for each setting‚ ensuring users can confidently navigate the shutter speed options․
Aperture Control
The Olympus OM10’s aperture control‚ thoroughly explained in the manual‚ is integral to managing depth of field and influencing image brightness․ While the OM10 offers automated modes‚ understanding aperture is key to unlocking creative potential․ The manual details how the aperture setting‚ controlled via the lens itself‚ dictates the size of the lens opening․
A wider aperture (smaller f-number) creates a shallow depth of field‚ ideal for isolating subjects‚ while a narrower aperture (larger f-number) yields greater depth of field‚ keeping more of the scene in focus․ The downloadable PDF manual provides clear diagrams illustrating the relationship between aperture and depth of field․ Mastering aperture control‚ as outlined in the manual‚ allows photographers to shape their images with precision and artistry․
Metering System
The Olympus OM10’s metering system‚ comprehensively covered in the manual‚ is a crucial component for achieving correct exposure․ The manual explains that the camera utilizes a Center-Weighted Averaging (CWA) metering pattern‚ prioritizing the light in the center of the frame while also considering the surrounding areas․ This system‚ detailed in the downloadable PDF‚ assists in determining the optimal aperture and shutter speed settings for various lighting conditions․
The manual illustrates how to interpret the light meter readings displayed in the viewfinder – indicators showing overexposure‚ underexposure‚ or correct exposure․ Understanding this system‚ as the manual guides‚ allows photographers to confidently navigate diverse shooting scenarios and consistently capture well-exposed images․ The OM10’s metering system‚ when understood through the manual‚ empowers precise control․
Film Compatibility
The Olympus OM10‚ as detailed in its manual‚ demonstrates impressive versatility regarding film types․ The manual explicitly states compatibility with 35mm film‚ encompassing a wide range of emulsions – from black and white to color negative and positive (slide) film․ The downloadable PDF manual provides guidance on selecting the appropriate film speed (ISO/ASA) setting on the camera to match the film being used‚ ensuring accurate exposure․
The manual also clarifies that the OM10 accommodates various film formats‚ including 24-exposure and 36-exposure rolls․ Proper film loading instructions‚ found within the manual‚ are essential for preventing damage and ensuring smooth film advance․ Understanding these film compatibility details‚ as outlined in the manual‚ unlocks the full creative potential of the OM10․
Understanding the Camera Body
The Olympus OM10’s manual details a finely crafted body‚ offering intuitive controls for shutter speed‚ aperture‚ and film advance—a complete system․
Top Panel Controls
The Olympus OM10’s top panel houses essential controls for operation‚ as detailed in the user manual․ The film advance lever‚ when wound‚ prepares the camera for the next exposure‚ and also advances the shutter speed counter․ Adjacent to this is the rewind crank‚ used to safely retract the exposed film back into the cassette․
The shutter speed dial allows selection from a range of speeds – from 1 second to 1/1000th of a second – influencing motion blur and light sensitivity․ The exposure compensation dial fine-tunes the light meter’s readings‚ crucial for challenging lighting scenarios․ The film speed dial sets the ISO sensitivity of the loaded film‚ ensuring accurate exposure․ Finally‚ the shutter release button initiates the photographic process‚ capturing the image․ Understanding these controls‚ as outlined in the manual‚ is key to mastering the OM10․
Back Panel Layout
The Olympus OM10’s back panel‚ as described in the manual‚ is relatively straightforward but crucial for film handling and viewing․ The primary feature is the hinged back door‚ which provides access to the film chamber․ Once opened‚ the film canister is loaded onto the left side‚ and the film leader is threaded onto the take-up spool on the right․
The viewfinder window offers a clear‚ bright view of the scene‚ displaying essential shooting information․ The film counter displays the number of exposures taken‚ helping you track your progress․ A small reset button allows you to zero the counter when loading new film․ The back panel also features a lock to secure the film door during operation‚ preventing accidental openings․ Familiarizing yourself with this layout‚ per the manual‚ ensures smooth film loading and shooting․
Bottom Panel Features
According to the Olympus OM10 manual‚ the bottom panel houses essential components for camera operation and mounting․ The prominent feature is the tripod socket‚ allowing secure attachment to a tripod for stable shooting‚ particularly useful in low-light conditions or for long exposures․
Adjacent to the tripod socket is the film rewind knob‚ used to retract the exposed film back into the canister․ The manual details the proper technique for smooth and controlled rewinding․ A film door release button is also located here‚ providing an alternative method for opening the film chamber․ Finally‚ the battery compartment is situated on the bottom panel‚ accommodating the power source that drives the camera’s electronic functions․ Understanding these features‚ as outlined in the manual‚ is key to efficient camera handling․
Using the Olympus OM10: A Step-by-Step Guide
The Olympus OM10 manual guides users through film loading‚ setting exposure‚ utilizing the light meter‚ and mastering focusing techniques for optimal results․
Loading Film
Loading film into the Olympus OM10 is a straightforward process‚ essential for capturing images with this classic camera․ Begin by opening the camera back using the film release lever located on the left side of the camera body․ Next‚ insert the 35mm film cartridge into the film chamber‚ ensuring the film leader extends towards the take-up spool on the right side․
Carefully thread the film leader onto the take-up spool and advance the film using the film advance lever․ Confirm the film is properly engaged by gently advancing the lever a couple of times and observing the rewind knob turning․ Close the camera back securely․ The OM10’s manual emphasizes proper film loading for reliable operation‚ preventing potential issues during shooting․ Always ensure the camera back is fully latched before use to avoid light leaks and ruined exposures․
Setting Shutter Speed and Aperture
The Olympus OM10 allows for both aperture-priority automatic exposure and full manual control․ To set the shutter speed‚ rotate the dial located on the top panel of the camera․ Available speeds range from 1 to 1/1000 of a second‚ plus Bulb mode for long exposures․ For aperture control‚ use the aperture ring on the mounted lens․ The OM10’s manual details how aperture affects depth of field․
In aperture-priority mode‚ the camera automatically selects the appropriate shutter speed based on your chosen aperture and the light meter reading․ For full manual control‚ disengage the aperture-priority mode using the lever near the shutter speed dial‚ allowing independent adjustment of both settings․ Mastering these controls is key to achieving desired creative effects and properly exposed photographs․
Utilizing the Light Meter
The Olympus OM10 features a built-in light meter to assist in achieving correct exposure․ When in aperture-priority mode‚ the viewfinder displays a needle indicating whether the scene is underexposed‚ correctly exposed‚ or overexposed․ Adjust the aperture until the needle aligns with the center mark for optimal results․ In manual mode‚ the meter functions similarly‚ guiding shutter speed and aperture adjustments․
The OM10’s manual explains that the meter responds to the light reflected from the scene․ Be mindful of extreme lighting conditions or highly reflective/absorptive surfaces‚ as these can influence meter accuracy․ Understanding how to interpret the meter’s readings is crucial for consistent and well-exposed photographs‚ especially when not relying on automatic settings․
Focusing Techniques
The Olympus OM10 employs a single-lens reflex (SLR) system‚ meaning you view the scene directly through the lens․ Focusing is achieved manually by rotating the focusing ring on the lens itself․ Observe the image in the viewfinder; as you rotate the ring‚ the image will become sharper․ Precise focusing is critical for image clarity․
The OM10 manual details split-image focusing aids within the viewfinder․ These aids help pinpoint sharpness․ When the image appears split‚ adjust the focus until the split image merges into a single‚ clear image․ Practice is key to mastering this technique․ Remember depth of field impacts focus – a smaller aperture increases it‚ offering a wider in-focus area․

Advanced Features and Functions
Explore the manual adapter for full control‚ utilize flash photography for creative lighting‚ and master depth of field for artistic image expression․
Using the Manual Adapter
The Olympus OM10 truly shines when paired with its optional manual adapter‚ unlocking complete creative control over your photography․ This adapter bypasses the camera’s automatic exposure system‚ allowing you to independently set both aperture and shutter speed․
To install‚ carefully attach the adapter to the top of the camera‚ ensuring a secure fit․ Once attached‚ the camera operates entirely in manual mode․ The light meter will still function‚ providing a reference point‚ but the final exposure decision rests solely with you․ This is ideal for challenging lighting situations or when you desire a specific artistic effect․
Experiment with different combinations of aperture and shutter speed to achieve desired depth of field and motion blur․ Remember to consult the PDF manual for detailed guidance on exposure principles and understanding the relationship between these settings․ Mastering the manual adapter elevates the OM10 from a capable camera to a truly versatile tool․
Flash Photography with the OM10
The Olympus OM10 is compatible with a variety of flash units‚ enhancing its capabilities in low-light conditions or for creative lighting effects․ The camera features a hot shoe for direct flash attachment‚ and also supports off-camera flash using a suitable sync cord․
When using flash‚ the OM10 automatically sets the shutter speed to 1/60th of a second․ Understanding this is crucial for proper exposure․ Refer to your flash unit’s manual for guidance on adjusting its power output to achieve the desired brightness․
The Olympus OM10 PDF manual provides detailed information on flash synchronization and troubleshooting potential issues․ Experiment with different flash modes – TTL (Through-The-Lens) if supported by your flash‚ or manual mode for full control․ Remember to consider bounce flash techniques to soften the light and create more flattering portraits․
Depth of Field Control
Mastering depth of field is essential for creative photography with the Olympus OM10․ Depth of field‚ the area in focus‚ is controlled by three key factors: aperture‚ focal length‚ and distance to the subject․ A wider aperture (smaller f-number like f/2․8) creates a shallow depth of field‚ ideal for isolating subjects with blurred backgrounds․
Conversely‚ a narrower aperture (larger f-number like f/16) yields a greater depth of field‚ keeping more of the scene sharp․ The Olympus OM10’s aperture ring on the lens allows precise control․ Consult the manual for a detailed explanation of the relationship between these settings․
Experimenting with different apertures will dramatically alter your images․ The OM10 PDF manual offers guidance on calculating and visualizing depth of field for various scenarios‚ helping you achieve your desired artistic effect․

Troubleshooting Common Issues
The Olympus OM10 manual addresses exposure‚ focusing‚ and film advance problems; solutions are readily available within the comprehensive PDF guide․
Exposure Problems
If your images are consistently over or underexposed with the Olympus OM10‚ consult the manual for detailed troubleshooting steps․ Incorrect shutter speed or aperture settings are frequent causes‚ so double-check these against your desired exposure․
The OM10’s metering system‚ while reliable‚ can be fooled by tricky lighting situations – strong backlighting or scenes with high contrast․ The manual explains how to use exposure compensation to override the meter’s reading in these cases․
Ensure the battery powering the meter is fresh‚ as a weak battery can lead to inaccurate readings․ Also‚ verify the manual adapter (if used) is correctly installed and functioning‚ as it affects exposure control․ Refer to the PDF manual for diagrams and specific instructions on checking these components․
Finally‚ remember that film ISO settings must match the film loaded in the camera; an incorrect ISO setting will result in improper exposure․
Focusing Difficulties
If you’re experiencing blurry images with your Olympus OM10‚ the issue likely lies with focusing․ The manual details the focusing screen and how to accurately align it with your subject․ Ensure sufficient light‚ as low light conditions make precise focusing challenging․
Check that your lens is securely mounted and that there’s no play or wobble․ A loose lens can cause inconsistent focusing․ Refer to the manual for proper lens mounting procedures․
Practice using the split-image rangefinder in the viewfinder; the manual provides a clear explanation of how this focusing aid works․ For moving subjects‚ pre-focus on a point where you anticipate the subject will be‚ then track it as it moves․
The PDF manual offers diagrams illustrating proper focusing techniques․ Remember to double-check focus before releasing the shutter‚ especially in critical situations․
Film Advance Issues
If the film isn’t advancing smoothly in your Olympus OM10‚ consult the manual for troubleshooting steps․ A common cause is improper film loading; ensure the film leader is correctly engaged with the take-up spool․ The manual’s diagrams are invaluable here․
Check for any obstructions within the film chamber․ Small debris can prevent smooth film travel․ If the film bunches up‚ do not force it․ Carefully rewind the film back into the canister and start the loading process again‚ referencing the PDF manual․
The manual adapter‚ if used‚ should be correctly installed․ An improperly fitted adapter can interfere with the film advance mechanism․ Ensure the camera’s back door is securely closed‚ as this activates the film advance system․
Regularly inspect the take-up spool for damage or wear‚ as described in the manual․
Resources and Further Learning
Download the Olympus OM10 PDF manual for detailed guidance; explore online forums like JLA FORUMS for community support and lens recommendations․
Downloading the Olympus OM10 PDF Manual
Accessing the Olympus OM10 PDF manual is remarkably straightforward‚ providing a comprehensive resource for understanding your camera’s functions․ Several online sources host this valuable document‚ ensuring easy access for all users․ The manual details everything from basic operation to advanced features‚ making it ideal for both beginners and experienced photographers alike․
You can readily find the manual through a simple web search‚ often linked on camera enthusiast websites and forums․ Be mindful of download sources‚ opting for reputable sites to ensure a safe and virus-free experience․ Some websites even offer printing services‚ allowing you to have a physical copy for convenient reference during shoots․ Remember to right-click and ‘Save Target As’ to download the PDF to your preferred folder․ If you encounter issues opening or printing the file‚ dedicated troubleshooting resources are also available online․
Online Communities and Forums
Engaging with online communities and forums dedicated to the Olympus OM10 is an invaluable way to enhance your photographic journey․ These platforms offer a wealth of knowledge‚ shared experiences‚ and troubleshooting assistance from fellow enthusiasts․ JLA FORUMS‚ for example‚ hosts active discussions and a dedicated user base eager to help․
You’ll find discussions covering everything from lens recommendations and repair advice to creative shooting techniques and manual interpretation․ These forums are excellent places to ask questions‚ share your work‚ and learn from others’ expertise․ Many members actively share PDF resources and links to helpful articles․ Participating in these communities fosters a collaborative learning environment‚ allowing you to deepen your understanding of the OM10 and unlock its full potential‚ going beyond the scope of the official manual․
Recommended Lenses for the OM10
The Olympus OM10‚ accepting Olympus interchangeable lenses‚ benefits greatly from exploring various optics to expand creative possibilities․ While the manual doesn’t detail specific recommendations‚ the Zuiko lenses are highly regarded․ A 50mm f/1․8 Zuiko is an excellent starting point – affordable‚ sharp‚ and versatile for everyday shooting․
For wider perspectives‚ consider a 28mm or 35mm Zuiko․ Telephoto options‚ like a 135mm‚ are ideal for portraits and compressing distance․ Exploring vintage lenses offers unique character and value․ Remember to check compatibility and condition before purchasing․ Online forums often discuss lens pairings and user experiences‚ supplementing the information in the OM10’s manual․ Investing in quality glass significantly enhances image quality and unlocks the camera’s full potential․