
Nikon F2 Manual: A Comprehensive Guide
Delving into the Nikon F2’s intricacies, this manual offers a detailed exploration of its features, operation, and maintenance, empowering photographers
to fully harness its capabilities and achieve exceptional results with this iconic camera․
The Nikon F2, introduced in 1971, represents a pivotal moment in 35mm SLR photography․ Building upon the success of the Nikon F, it refined the design and incorporated significant advancements, quickly becoming a favorite among professionals and serious enthusiasts․ This camera isn’t merely a piece of equipment; it’s a testament to robust mechanical engineering and enduring photographic principles․
Known for its reliability and exceptional build quality, the F2 offers a tactile shooting experience that many modern cameras lack․ It’s a fully mechanical camera, meaning it operates without reliance on batteries for core functions like the shutter, providing dependability in diverse conditions․ Understanding its operation requires a grasp of fundamental photographic concepts, which this manual aims to provide․ Prepare to embark on a journey into the world of classic photography with this iconic Nikon!
Historical Context and Significance
Launched in 1971, the Nikon F2 arrived during a golden age of SLR development, competing with Canon and Pentax for market dominance․ It followed the groundbreaking Nikon F, addressing user feedback and incorporating technological improvements․ The F2 quickly gained prominence, becoming the workhorse for photojournalists covering significant events globally, including the Vietnam War and Olympic Games․
Its significance lies in its blend of mechanical precision and advanced features for the time, like interchangeable focusing screens and a wide range of compatible lenses․ The F2’s robust construction and reliability made it a trusted tool in demanding environments․ It helped solidify Nikon’s reputation for quality and innovation, influencing subsequent camera designs and establishing a legacy that continues to resonate with photographers today․ It represents a pivotal shift towards more sophisticated and versatile SLR systems․
Key Features and Specifications
The Nikon F2 is a mechanically operated, 35mm film SLR boasting a horizontally traveling focal-plane shutter with speeds from 1 to 1/2000th of a second, plus Bulb․ It features a large, bright viewfinder offering approximately 93% coverage․ The camera accepts the Nikon F mount, enabling compatibility with a vast array of Nikkor lenses․

Key specifications include a standard film advance lever and a rewind crank․ It supports interchangeable focusing screens for customized viewing․ The F2 also offers a hot shoe for flash synchronization and a depth-of-field preview lever․ Its robust build utilizes high-quality materials, ensuring durability․ Importantly, it lacks built-in light metering, often requiring the use of an external meter for accurate exposure control․ Weight is approximately 1020g without a lens․

Understanding the Nikon F2 Body
The Nikon F2’s body is a testament to robust engineering, offering a solid feel and precise mechanics designed for enduring performance and reliable operation․

Body Construction and Materials
The Nikon F2’s body is primarily constructed from a high-quality aluminum alloy, contributing to its substantial weight and exceptional durability․ This metal construction provides excellent resistance to wear and tear, ensuring the camera can withstand rigorous use in various shooting environments․
Key components, like the top and bottom plates, are meticulously crafted, offering a secure and comfortable grip for the photographer․ The use of metal also aids in shielding the internal mechanisms from external factors like dust and moisture․ While predominantly aluminum, certain parts incorporate steel for increased strength in critical areas, such as the film advance lever and shutter speed dial․
The exterior finish typically features a textured black paint, providing both aesthetic appeal and a tactile surface for enhanced handling․ This robust build quality is a defining characteristic of the Nikon F2, solidifying its reputation as a professional-grade camera built to last․
Shutter Mechanism Details
The Nikon F2 employs a horizontally-traveling focal plane shutter, renowned for its precision and reliability․ This mechanism consists of two curtains that travel across the film plane, controlling the duration of light exposure․ Shutter speeds range from 1 second to 1/2000th of a second, offering versatility for diverse photographic scenarios․
A unique feature is the self-timer, integrated directly into the shutter mechanism, providing a delay before release․ The F2’s shutter is entirely mechanical, meaning it operates without reliance on batteries, ensuring functionality even in challenging conditions․ The sound of the shutter is distinctive and often associated with the camera’s robust build․
Regular cleaning and lubrication are crucial for maintaining optimal shutter performance․ Proper maintenance prevents sticking or inaccurate timing, preserving the camera’s core functionality for years to come․ The mechanical design contributes to the F2’s longevity and enduring appeal․
Metering System Explained
The Nikon F2 offers a center-weighted averaging metering system, accessible through a separate metering head that attaches to the top plate․ This system measures light predominantly from the center of the frame, diminishing towards the edges, mimicking how the human eye perceives light․
The metering head requires a separate battery to operate, powering the needle indicator within the viewfinder․ This needle displays the exposure relationship between aperture and shutter speed, guiding photographers to achieve correct exposure․ Understanding the needle’s position – under, over, or at zero – is key to accurate metering․
It’s important to note the F2’s metering system is coupled to the lens aperture; therefore, setting the desired aperture is the first step․ The meter then indicates the appropriate shutter speed for correct exposure․ Regular battery checks are essential for reliable metering performance․
Viewfinder System and Focusing Screen Options
The Nikon F2 boasts a bright and clear pentaprism viewfinder, offering approximately 93% coverage of the actual image area․ This provides a generous view for composition, though some framing outside the viewfinder is possible․ The viewfinder displays crucial shooting information, including the shutter speed, aperture setting (when using a metering head), and a microprism collar for precise focusing․
Notably, the F2 allows for interchangeable focusing screens․ Different screen options cater to various shooting styles and preferences․ Options include the standard Super Bright Screen, the Solitar focusing screen for enhanced split-image focusing, and others designed for specific applications like macro photography․
Changing the focusing screen requires careful handling to avoid damage․ Proper alignment is crucial for accurate focusing․ The viewfinder diopter adjustment allows users to compensate for vision differences, ensuring a sharp and clear view of the focusing aids․
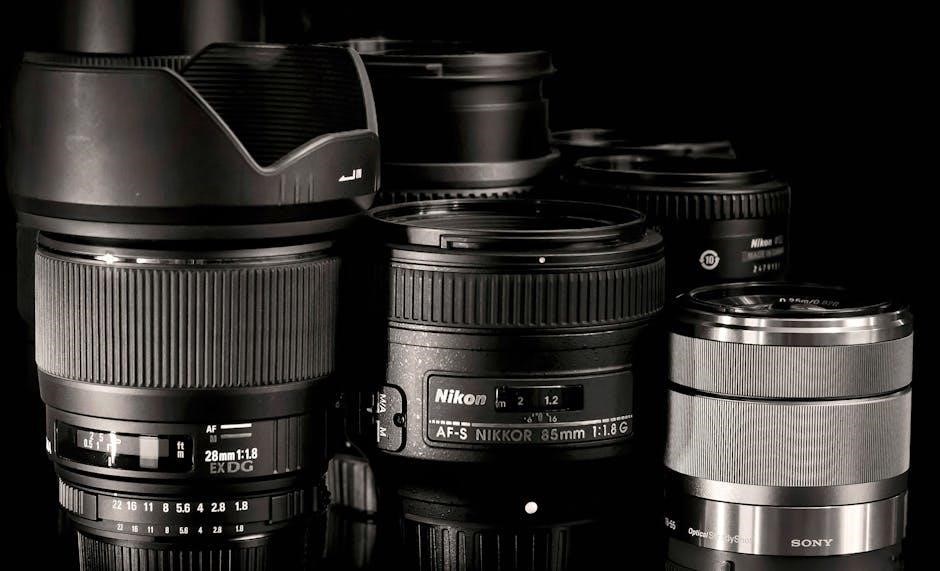
Lenses Compatible with the Nikon F2
The Nikon F2 utilizes the Nikon F mount, enabling compatibility with a vast array of Nikkor lenses and third-party options, expanding photographic possibilities․
Nikkor Lenses: A Detailed Overview
Nikkor lenses designed for the Nikon F2 represent a cornerstone of its system, offering exceptional optical quality and performance․ The initial Nikkor lenses, often referred to as “Non-AI” lenses, require an aperture preview ring on the F2 for full functionality․ These lenses cover a broad spectrum of focal lengths, from wide-angle 20mm options ideal for landscapes, to standard 50mm lenses perfect for everyday photography, and telephoto lenses extending to 300mm or beyond for wildlife and sports․
Later “AI” and “AIS” Nikkor lenses, introduced progressively, offer improved metering compatibility and ease of use with the F2․ These lenses feature an aperture index mark that the camera can read directly․ The quality of Nikkor glass is renowned, delivering sharpness, clarity, and pleasing bokeh․ Understanding the characteristics of each Nikkor lens – its focal length, maximum aperture, and optical formula – is crucial for maximizing the F2’s potential․
Adapting Non-Nikkor Lenses
While the Nikon F2 excels with Nikkor lenses, adapting lenses from other manufacturers is achievable, though it requires careful consideration․ Adapters are available to mount lenses with different bayonet mounts, such as Canon FD or Pentax K, onto the F2’s Nikon F mount․ However, full functionality isn’t always guaranteed․ Adapting lenses often results in the loss of automatic diaphragm control, requiring manual aperture adjustment․
Focusing may also be manual, even with lenses that originally offered autofocus․ It’s crucial to select an adapter specifically designed for the Nikon F mount and the lens you intend to use․ Light sealing can also be an issue, potentially leading to internal reflections and reduced image contrast․ Thorough testing is recommended to ensure proper alignment and image quality when using adapted lenses with the Nikon F2․
Lens Mounting and Removal Procedures
Mounting a Nikkor lens onto the Nikon F2 is a straightforward process․ Align the red dot on the lens with the corresponding red dot on the camera body․ Gently insert the lens into the mount and rotate it clockwise until it clicks securely into place․ Avoid forcing the lens; if it doesn’t turn smoothly, re-align the dots․
To remove a lens, press the lens release button located on the front of the camera body․ While holding the button, rotate the lens counter-clockwise until it disengages․ Support the lens as you rotate it to prevent it from dropping․ Always store lenses with a rear cap to protect the delicate glass elements from dust and damage․ Regular inspection of the lens mount for debris is also recommended․

Operating the Nikon F2: Core Functions
Mastering the F2 involves understanding film loading, shutter speed adjustments, aperture control, and precise focusing techniques – essential skills for optimal photographic outcomes․
Loading and Unloading Film
Loading film into the Nikon F2 is a straightforward process, yet requires careful attention to detail․ Begin by disengaging the film rewind knob and lifting the film door lever․ Insert the 35mm film cartridge into the film chamber, ensuring it seats correctly․ Pull the film leader across the camera body to the take-up spool, leaving a small tail․
Engage the film advance lever several times, verifying the film is properly catching on the take-up spool․ Close the film door and gently return the film rewind knob to its locked position․ To advance the film, use the film advance lever, counting the frames․
Unloading film is equally simple; Press the film rewind release button on the bottom of the camera․ Lift the film door and use the rewind crank to retract the film fully back into the cartridge․ Carefully remove the film cartridge and dispose of it responsibly․ Always avoid exposing the film to direct sunlight during loading or unloading․
Setting the Shutter Speed
The Nikon F2’s shutter speed dial is located on the top plate of the camera, offering a wide range of settings from 1 second to 1/2000th of a second, plus Bulb (B) for long exposures․ To adjust the shutter speed, rotate the dial until the desired setting aligns with the indicator mark․
Understanding shutter speed is crucial for controlling motion in your photographs․ Faster shutter speeds freeze action, while slower speeds allow for motion blur․ The ‘B’ setting keeps the shutter open as long as the shutter release button is pressed, ideal for astrophotography or light painting․
Remember to consider the reciprocal rule when shooting handheld: generally, use a shutter speed at least equal to the reciprocal of the focal length of your lens to avoid camera shake․ The F2’s robust shutter mechanism ensures accurate and reliable operation across all speeds․
Aperture Control and Depth of Field
Aperture is controlled via the aperture ring on the Nikkor lens itself, not the camera body on the Nikon F2․ The f-stop numbers, ranging from the largest aperture (smallest number, e․g․, f/1․4) to the smallest (largest number, e․g․, f/22), determine the lens opening size․
The aperture significantly impacts depth of field – the area in your image that appears sharp․ A wider aperture (smaller f-number) creates a shallow depth of field, isolating your subject with a blurred background․ Conversely, a narrower aperture (larger f-number) increases depth of field, keeping more of the scene in focus․
Experimenting with different apertures is key to mastering creative control․ Remember that aperture also affects the amount of light entering the camera, influencing exposure alongside shutter speed and ISO․
Focusing Techniques with the F2
The Nikon F2 relies on manual focusing, utilizing the focusing ring on the lens and the viewfinder’s focusing aids․ The split-image rangefinder in the center of the viewfinder is crucial; align the split image for sharp focus on your primary subject․

For precise focusing, especially in low light, use the microprism collar surrounding the split-image․ Its shimmering effect diminishes as focus improves․ Practice smooth, deliberate adjustments of the focusing ring․ Depth of field preview (using the depth-of-field lever) helps visualize the in-focus area at your chosen aperture;
Consider focusing techniques like pre-focusing (setting focus beforehand) and zone focusing (estimating distance and setting a corresponding aperture)․ Consistent practice is essential for achieving consistently sharp images with the F2․

Advanced Features and Techniques
Unlock the F2’s full potential with techniques like multiple exposures, utilizing interchangeable focusing screens, and mastering the self-timer for creative control․
Using the Exposure Meter Effectively
The Nikon F2’s built-in exposure meter is a crucial tool for achieving properly exposed photographs․ Understanding its operation is key to maximizing image quality․ The meter operates in a center-weighted averaging mode, meaning it prioritizes the light readings from the center of the frame․
To utilize the meter, first, set the desired film speed (ISO) on the camera body․ Then, partially depress the shutter button to activate the meter․ Observe the needle in the viewfinder; it indicates whether the scene is underexposed (needle to the left), overexposed (needle to the right), or correctly exposed (needle centered)․
Adjust either the aperture or shutter speed until the needle aligns with the center mark․ Remember that aperture controls depth of field, while shutter speed controls motion blur․ Practice correlating meter readings with real-world lighting conditions to develop your intuitive understanding of exposure․
Multiple Exposure Capabilities
The Nikon F2 allows for creative multiple exposures, enabling you to superimpose several images onto a single frame․ To initiate this, engage the multiple exposure lever, typically located on the camera’s top plate, after each exposure․ This prevents the film advance mechanism from automatically advancing the film․
Carefully compose and expose each subsequent image, remembering that each exposure adds to the overall brightness of the final result․ It’s often beneficial to use negative compensation (reducing exposure) for each additional frame to avoid overexposure․
To disengage the multiple exposure function, return the lever to its original position․ Then, manually advance the film to the next unexposed frame․ Experiment with different combinations of images and exposure settings to achieve unique and artistic effects․
Interchangeable Focusing Screens
The Nikon F2 offers the flexibility of interchangeable focusing screens, allowing photographers to customize the viewfinder image to suit their specific shooting needs․ Different screens provide varying focusing aids and brightness levels․ Common options include the standard screen, the Super Bright Topcon screen for low-light conditions, and screens with split-image or microprism collars for precise focusing․
To change the focusing screen, carefully remove the viewfinder eyepiece and locate the retaining ring․ Gently unscrew the ring and lift out the existing screen․ Insert the new screen, ensuring it’s properly aligned, and secure it with the retaining ring․
Exercise caution during this process to avoid damaging the screen or the camera’s internal components․ Regularly cleaning the focusing screen is crucial for maintaining optimal viewing clarity․
Using the Self-Timer
The Nikon F2’s self-timer allows for delayed shutter release, ideal for self-portraits or situations where minimizing camera shake is crucial․ To activate the self-timer, locate the lever on the front of the camera body, typically near the shutter button․
Lift the lever and rotate it to the ‘S’ position․ This will arm the self-timer․ Press the shutter button fully, and the camera will initiate a delay – usually around 10 seconds – before firing the shutter․ During the delay, the small red lamp on the front of the camera will illuminate․
Avoid touching the camera during the delay to prevent unwanted movement․ After the shutter fires, return the self-timer lever to its original position․
Maintenance and Troubleshooting
Ensuring longevity, proper cleaning and careful storage are vital for the Nikon F2․ Addressing common issues promptly will maintain optimal performance and reliability․
Cleaning and Storage Recommendations
Regular cleaning is crucial for maintaining your Nikon F2’s functionality․ Gently remove dust from the body and lens with a soft brush or blower․ Avoid using harsh chemicals or abrasive cleaners, as these can damage the finish․ For the viewfinder, use a dedicated lens cleaning tissue and solution․
When storing the camera, place it in a dry, dust-free environment․ A camera bag or case is highly recommended to protect it from physical damage and moisture․ If storing for an extended period, remove the batteries to prevent corrosion․ Periodically check the light seals to ensure they haven’t deteriorated, as this can affect film quality․
Avoid extreme temperatures and humidity․ Proper storage will ensure your Nikon F2 remains in excellent condition for years to come, ready for your next photographic adventure․
Common Issues and Solutions
A frequent issue with the Nikon F2 is a stiff shutter speed dial; gentle manipulation and occasional lubrication can resolve this․ Light leaks often stem from deteriorated light seals – replacement is necessary․ If the film advance is rough, inspect the cloth rewind damper for wear or hardening, requiring replacement․
Viewfinder issues, like dimness, might indicate a dirty focusing screen, which can be carefully cleaned․ Erratic meter readings could signal a failing battery or corroded contacts․ Always check the battery compartment first․ If the self-timer isn’t functioning, it may require professional servicing․
Remember, attempting complex repairs without proper knowledge can cause further damage․ When in doubt, consult a qualified camera technician for diagnosis and repair․
Servicing and Repair Options
For Nikon F2 servicing, several reputable repair shops specialize in classic film cameras․ Consider companies like KEH Camera, or local camera repair technicians with proven experience․ Expect costs to vary significantly based on the issue – a CLA (Clean, Lubricate, Adjust) typically ranges from $150 to $300․
More complex repairs, such as shutter replacement or meter calibration, can exceed $400․ Before sending your F2 for service, obtain a detailed estimate and inquire about turnaround time․ DIY repairs are possible for experienced individuals, but proceed cautiously, as improper handling can cause further damage․
Online forums and communities dedicated to the Nikon F2 can offer valuable advice and recommendations for reliable repair services;

Accessories for the Nikon F2
Enhance your Nikon F2 experience with motor drives, external light meters, protective cases, comfortable straps, and a variety of filters and lens hoods․
Motor Drives and Winders
For photographers demanding rapid shooting capabilities, the Nikon F2 offered several motor drive and winder options․ The MD-1 Motor Drive, a substantial unit, provided fully automatic film advance and continuous shooting at up to five frames per second, requiring a separate power supply․
The MD-2 Motor Drive was a later, more compact alternative, also offering continuous shooting but with slightly reduced speed․ For those seeking a lighter, less power-hungry solution, the MW-1 Manual Winder allowed for single or sequential frame advance with a winding lever, ideal for situations where precise control was preferred․
These accessories significantly expanded the F2’s versatility, making it suitable for sports, photojournalism, and other fast-paced photographic disciplines․ Proper installation and battery maintenance were crucial for optimal performance of these devices․
External Light Meters
While the Nikon F2 featured a built-in exposure meter, many photographers preferred utilizing external light meters for greater accuracy and versatility․ These handheld devices offered both incident and reflected light readings, providing more comprehensive exposure data, especially in challenging lighting conditions․
Popular options included the Nikon Photomic Finder FM, which coupled with the F2’s viewfinder, and various third-party meters from brands like Sekonic and Minolta․ External meters allowed for precise measurement of light falling on the subject (incident) or reflected from it (reflected), ensuring optimal exposure․
Understanding how to interpret readings from these meters and correlate them with the F2’s aperture and shutter speed settings was essential for achieving consistently well-exposed photographs․
Cases and Straps
Protecting your Nikon F2 investment necessitated the use of a quality case and strap․ Nikon offered dedicated leather cases designed specifically for the F2, providing both cushioning and a classic aesthetic․ These cases shielded the camera body from scratches, dust, and minor impacts during transport and storage․
A robust neck strap was equally crucial, ensuring secure handling and preventing accidental drops․ Nikon straps, often branded with the company logo, were durable and comfortable for extended use․
Aftermarket options from third-party manufacturers also provided viable alternatives, offering varying levels of protection and style․ Regularly inspecting both the case and strap for wear and tear was vital for maintaining the F2’s safety and longevity․

Filters and Lens Hoods
Enhancing image quality with the Nikon F2 often involved utilizing filters and lens hoods․ Nikon offered a range of filters, including UV, skylight, and polarizing filters, each serving a specific purpose․ UV filters protected the front element of the lens, while skylight filters subtly softened images and reduced haze․ Polarizing filters minimized glare and boosted color saturation․
Lens hoods were essential for preventing stray light from entering the lens, reducing flare and improving contrast․ Nikon provided dedicated lens hoods for various Nikkor lenses, ensuring a snug and effective fit․
Experimenting with different filters and lens hoods allowed photographers to creatively control light and achieve desired effects, maximizing the F2’s optical potential․