Honeywell TH6220D1028 Thermostat: A Comprehensive Guide
This guide details the FocusPRO 6000 Series thermostat, offering instructions for installation, programming, and troubleshooting. It covers system types, wiring, and advanced settings.
The Honeywell TH6220D1028 is a programmable digital thermostat from the FocusPRO 6000 Series, designed to provide convenient and efficient temperature control within your home. This thermostat is pre-programmed for immediate use, requiring only time and day setting for initial operation. It supports up to 2 heat and 2 cool systems, offering flexibility for various home comfort configurations.
This model boasts features like compressor protection and Adaptive Intelligent Recovery, optimizing system performance and longevity. The thermostat allows for the creation of customized program schedules, accommodating up to four distinct time periods daily. Users can easily override these schedules for temporary or permanent adjustments, ensuring comfort tailored to their needs.
The TH6220D1028 is designed for straightforward installation and operation, with a comprehensive manual available to guide users through each step. It aims to deliver affordable and hassle-free climate control, enhancing home comfort and potentially reducing energy consumption.
What’s Included in the Box
Upon opening the Honeywell TH6220D1028 package, you’ll find several key components essential for installation and operation. The primary item is, of course, the FocusPRO 6000 Series Programmable Thermostat unit itself, featuring a clear digital display and intuitive controls. Included is a wallplate, designed for secure mounting and facilitating easy wiring connections.
You’ll also receive a screw pack containing the necessary hardware for attaching the wallplate to the wall and securing the thermostat to the plate. A detailed installation guide is provided, offering step-by-step instructions and wiring diagrams to assist with the setup process. This manual covers system types and pre-installation checklists.
Additionally, the box contains information regarding Honeywell’s customer care support, should you require assistance. While specific accessories may vary, these core components ensure a smooth and successful installation experience for the TH6220D1028 thermostat.

Installation
Proper installation involves a pre-installation checklist, wallplate mounting, careful wiring according to diagrams, and selecting appropriate power options for reliable operation.
Pre-Installation Checklist
Before beginning the installation of your Honeywell TH6220D1028 thermostat, a thorough pre-installation checklist is crucial for a smooth and successful setup. First, always turn off power to your heating and cooling system at the breaker box to prevent electrical shock. Verify compatibility with your existing system – this thermostat supports up to 2 heat and 2 cool stages.
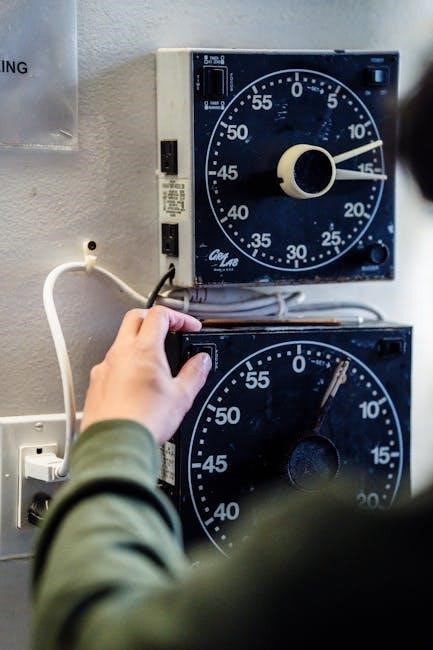
Carefully examine your existing wiring. Note the color and function of each wire connected to your old thermostat. A photograph can be incredibly helpful during the reconnection process. Ensure you have the necessary tools readily available, including a screwdriver, wire strippers, and potentially a level for accurate wallplate mounting.
Review the wiring diagrams provided in this manual to understand how the wires correspond to the terminals on the TH6220D1028. If you are unsure about any aspect of the wiring, it is highly recommended to consult a qualified HVAC professional. Incorrect wiring can damage your system or the thermostat itself. Finally, confirm you have all the components included in the box before proceeding.
Wallplate Installation
Begin the wallplate installation by carefully removing your old thermostat’s wallplate. Do not disconnect the wires yet! Position the new Honeywell TH6220D1028 wallplate on the wall, ensuring it’s level for a professional appearance. Use the provided mounting screws to secure the wallplate to the wall. If existing screw holes don’t align, you may need to drill new ones – use appropriate wall anchors if necessary.
Once the wallplate is securely mounted, carefully disconnect the wires from the old thermostat, one at a time. As you disconnect each wire, immediately connect it to the corresponding terminal on the new wallplate, referencing your pre-installation wiring notes or the wiring diagrams. Ensure each wire is firmly inserted into the terminal.
Gently push any excess wire back into the wall opening. Avoid pinching or damaging the wires. Double-check all connections to confirm they are secure and correctly matched before proceeding to the next step. A properly installed wallplate is the foundation for a successful thermostat installation.
Wiring Diagrams & Compatibility
The Honeywell TH6220D1028 is compatible with most 24V heating and cooling systems, supporting up to 2 heat and 2 cool stages. Crucially, verify your system’s voltage before installation. Refer to the detailed wiring diagrams included in the manual – these illustrate connections for common system configurations like gas, oil, electric, and heat pump systems.
Typical wiring involves terminals for Rh, Rc, W, Y, G, and C (common). The ‘C’ wire is often required for consistent power. If you lack a ‘C’ wire, a ‘C’ wire adapter may be necessary. Incorrect wiring can damage your HVAC system or the thermostat, so meticulous attention to detail is vital.
Ensure wires are securely connected to the correct terminals. If unsure, consult a qualified HVAC technician. Compatibility issues can arise with proprietary or uncommon systems; always double-check before proceeding. Proper wiring guarantees optimal performance and prevents potential hazards.
Power Options & Mounting
The Honeywell TH6220D1028 primarily operates on 24VAC, typically supplied through the heating and cooling system’s control wiring. A ‘C’ wire (common wire) is generally needed for consistent power, ensuring reliable operation and display functionality. If a ‘C’ wire isn’t present, consider using a ‘C’ wire adapter kit – instructions are available in the full manual.
For mounting, the thermostat utilizes a detachable wallplate. Ensure the mounting location is away from direct sunlight, drafts, and other temperature-influencing factors. Use the provided screws and anchors for secure attachment to a standard electrical box or drywall.
Level the wallplate before securing it. Proper mounting is crucial for accurate temperature sensing and a clean aesthetic. Double-check all connections before snapping the thermostat onto the wallplate. Avoid forcing the connection; it should fit snugly and securely.

Programming the Thermostat
The TH6220D1028 is pre-programmed but requires time and day setting. Users can create four time periods per day, and easily override schedules as needed.
Setting the Time and Day
Accurate time and day settings are crucial for your Honeywell TH6220D1028 thermostat to function correctly with programmed schedules. To begin, access the thermostat’s menu. Navigate to the “Time & Day” setting – the exact path may vary slightly, but it’s generally found within the main menu options. Use the up and down arrow buttons to adjust the current hour. Confirm your selection by pressing the “Hold/Run” button.
Repeat this process for setting the minutes. Next, adjust the date. Typically, you’ll set the month and day sequentially, again using the arrow buttons and confirming with “Hold/Run”. Finally, set the day of the week. Ensure you select the correct day to align with your programmed schedule.

Double-check all settings before exiting the menu. An incorrect time or date will cause your heating and cooling programs to operate at unintended times, potentially impacting comfort and energy savings. Save your changes to finalize the time and date configuration.
Understanding Program Schedules
The Honeywell TH6220D1028 thermostat utilizes programmable schedules to automatically adjust temperatures throughout the day, optimizing comfort and energy efficiency. These schedules are divided into four distinct time periods: Wake, Leave, Return, and Sleep. Each period allows you to set a specific temperature. The “Wake” period sets the temperature for when you typically rise in the morning. “Leave” adjusts the temperature while you’re away from home.

The “Return” period sets the temperature for when you come back home, and “Sleep” sets a comfortable temperature for nighttime. You can customize each period’s start time and temperature independently. The thermostat operates by transitioning between these programmed temperatures based on the current time.
Understanding these periods is key to creating a schedule that matches your lifestyle. Remember to consider your daily routines when setting the times and temperatures for each period to maximize savings and comfort.
Creating and Editing Programs (Four Time Periods)
To create or edit a program on your Honeywell TH6220D1028, access the programming mode via the thermostat’s menu. You’ll navigate through the four time periods – Wake, Leave, Return, and Sleep – individually. For each period, you’ll first set the start time using the up and down arrows. Then, adjust the desired temperature for that period. The thermostat allows for separate programming for each day of the week, or you can copy a program to multiple days.
To edit an existing program, simply select the day and period you wish to modify and adjust the time or temperature as needed. Remember to save your changes after each adjustment. The thermostat’s display will guide you through each step of the process. Pages 9-11 of the manual provide detailed instructions and visual aids for programming.
Temporary & Permanent Overrides
The Honeywell TH6220D1028 allows for both temporary and permanent overrides of your programmed schedule. A temporary override lets you adjust the temperature for a specific duration, returning to the normal schedule afterward. This is ideal for short-term comfort adjustments. To initiate a temporary override, simply use the temperature up or down buttons; the thermostat will ask you to confirm the duration.
For a permanent override, also known as “Hold,” you manually adjust the temperature, and it remains at that setting indefinitely, ignoring the programmed schedule. To cancel a permanent hold and revert to the programmed schedule, you’ll need to access the thermostat’s menu and select the “Cancel Hold” option. These override features provide flexibility to manage your comfort levels as needed, ensuring optimal temperature control.

Features & Functions
This thermostat boasts compressor protection, adaptive intelligent recovery, and multiple fan control options for enhanced efficiency and comfort. These features optimize system performance.
Compressor Protection
The Honeywell TH6220D1028 thermostat incorporates a crucial compressor protection feature designed to safeguard your cooling system from potential damage; This function prevents the compressor from rapidly cycling on and off, a common issue that can lead to premature wear and tear, ultimately shortening its lifespan and incurring costly repairs.
Specifically, the thermostat monitors the time between cooling cycles. If a cycle is too short – typically less than five minutes – the thermostat will delay initiating the next cooling cycle. This delay ensures the compressor has sufficient time to equalize pressure and temperature, preventing strain and potential failure.
This protection is particularly beneficial in situations with rapid temperature fluctuations or systems prone to short-cycling. It’s a proactive measure that contributes to the longevity and reliability of your air conditioning unit, offering peace of mind and reducing long-term maintenance expenses. The compressor protection feature operates automatically, requiring no manual adjustment or intervention from the user.
Adaptive Intelligent Recovery
Honeywell’s Adaptive Intelligent Recovery feature within the TH6220D1028 thermostat optimizes heating and cooling performance by learning your system’s characteristics. Unlike traditional recovery methods that simply start the system early, this feature intelligently calculates the precise time needed to reach your desired temperature.
It analyzes how quickly your home heats up or cools down, considering factors like outdoor temperature, insulation, and the efficiency of your HVAC system. Over time, the thermostat adapts to these variables, providing more accurate and efficient temperature control. This results in improved comfort and reduced energy consumption.
The benefit is a consistently comfortable indoor environment without wasteful overshooting of the setpoint. The system learns and adjusts, minimizing the time it takes to reach the desired temperature, and avoiding unnecessary energy usage. This ‘smart’ recovery ensures you’re comfortable when you need to be, and saves energy when you don’t.
Fan Control Options
The Honeywell TH6220D1028 thermostat offers several fan control options to enhance your comfort and indoor air quality. You can select from “Auto,” “On,” and programmable fan settings within the thermostat’s menu. “Auto” mode operates the fan only during heating or cooling cycles, conserving energy and providing standard air circulation.
Choosing “On” keeps the fan running continuously, even when heating or cooling isn’t active. This provides consistent air circulation, which can help distribute temperature more evenly throughout your home and improve air filtration. Programmable settings allow you to customize fan operation based on your schedule.
You can set specific times for the fan to run, independent of heating or cooling, for enhanced air circulation or ventilation. These options provide flexibility to tailor the fan’s operation to your specific needs and preferences, optimizing both comfort and energy efficiency.

Troubleshooting
This section provides solutions for common issues and explains error codes. Refer to it for diagnosing problems with your TH6220D1028 thermostat’s operation and functionality.
Common Issues & Solutions
Thermostat Not Powering On: First, verify the power source – check the circuit breaker and ensure the thermostat is securely mounted on the wallplate. If using batteries, replace them with fresh ones. A loose connection at the wallplate is also a frequent cause; carefully reseat the thermostat.
Incorrect Temperature Readings: Ensure the thermostat isn’t exposed to direct sunlight, drafts, or heat-generating appliances. These can skew readings. Calibrate the temperature if necessary, referencing a known accurate thermometer. Check for obstructions blocking airflow around the unit.
System Not Responding to Changes: Confirm the system switch is in the correct mode (Heat, Cool, Auto). Verify wiring connections, particularly the common wire (C-wire), which is crucial for consistent power. A faulty relay or wiring issue could also be the culprit.
Display Issues: If the display is dim or flickering, try adjusting the brightness settings. If the display is blank, revisit the power source checks mentioned above. A failing display may require thermostat replacement.
Program Schedule Not Working: Double-check the programmed schedule for accuracy. Ensure the time and day are correctly set. Temporary overrides can sometimes conflict with the programmed schedule; clear any active overrides.
Error Codes & Meanings
“E1” – Loss of Common Wire (C-wire): This indicates insufficient power to the thermostat. Verify the C-wire is correctly connected at both the thermostat and the furnace/air handler. A C-wire adapter may be needed if one isn’t present.
“E2” – Heating System Fault: Suggests a problem with the heating system itself – a faulty furnace, blocked vent, or tripped safety switch. Consult a qualified HVAC technician.
“E3” – Cooling System Fault: Indicates an issue with the cooling system, such as a malfunctioning compressor, frozen evaporator coil, or tripped breaker. Professional HVAC service is recommended.
“E4” – Sensor Error: A problem with the internal temperature sensor. Try resetting the thermostat. If the error persists, the thermostat may need replacement.
“E5” – Communication Error: Typically occurs with more complex systems. Check wiring connections between the thermostat and the outdoor unit or control board.
“Flash 0” – Normal Operation: This isn’t an error, but a confirmation that the thermostat is functioning correctly. Other flashes may indicate specific system states.

Advanced Settings

Customize your thermostat with options like temperature scale adjustments (Fahrenheit or Celsius) and a factory reset to clear all programmed settings.
Adjusting Temperature Scales
The Honeywell TH6220D1028 thermostat allows you to display temperatures in either Fahrenheit (°F) or Celsius (°C) to suit your preference. To change the temperature scale, you’ll need to access the thermostat’s settings menu. Begin by pressing the ‘Menu’ button on the thermostat faceplate. Navigate through the menu options using the up and down arrow buttons until you locate the ‘Settings’ or ‘Preferences’ option – the exact wording may vary slightly.
Once in the settings menu, look for an option labeled ‘Temperature Scale’ or similar. Select this option, and you’ll be presented with the choice between Fahrenheit and Celsius. Use the arrow buttons to highlight your desired scale and then press the ‘Select’ or ‘Enter’ button to confirm your choice. The thermostat display will briefly show a confirmation message, and then revert to the main screen, now displaying temperatures in the newly selected scale. This change is permanent until you repeat the process to switch back.
Resetting to Factory Defaults
If you encounter persistent issues with your Honeywell TH6220D1028 thermostat, or wish to clear all custom settings and return it to its original factory state, a reset can be performed. Be aware that this will erase all programmed schedules, temperature preferences, and any personalized configurations you’ve made. To initiate a factory reset, access the thermostat’s settings menu by pressing the ‘Menu’ button.
Navigate through the menu options using the arrow buttons until you find the ‘Settings’ or ‘Preferences’ section. Within this menu, locate the ‘Reset’ or ‘Factory Reset’ option. Selecting this option will typically prompt a confirmation message, asking if you are sure you want to proceed. Confirm your decision by selecting ‘Yes’ or ‘OK’. The thermostat will then restart, and upon completion, will display the initial setup screens as if it were a brand-new device, requiring you to re-enter your settings.