
The Hoover FH50150 is a versatile floor cleaner, detailed in its user manual, offering a convenient solution for hard floors – say goodbye to traditional mopping!
What is the Hoover FH50150?
The Hoover FH50150 is a powerful and efficient floor cleaner designed to tackle various hard floor surfaces within your home․ As detailed in the user manual, this appliance isn’t just a mop replacement; it’s a comprehensive cleaning system․ It vacuums dry debris, washes floors with rotating scrub brushes, and simultaneously squeegees them dry, leaving a streak-free finish․
This multi-functional device streamlines the cleaning process, saving you time and effort․ The user manual highlights its ability to handle everyday spills and messes, offering a convenient alternative to traditional mopping methods․ It’s a game-changer for maintaining spotless hard floors․
Key Features and Benefits
The Hoover FH50150 boasts several key features, as outlined in the user manual, enhancing its cleaning performance․ Its “Triple Action” cleaning process – vacuuming, washing, and drying – is a standout benefit․ The HeatBoost Technology warms the cleaning solution, improving its effectiveness on stubborn stains․
A dual-tank system keeps clean and dirty water separate, preventing re-deposition of grime․ Edge cleaning capabilities ensure thorough cleaning along baseboards and in corners․ Ultimately, the FH50150 offers convenience, efficiency, and a superior clean for all your hard floors․

Unboxing and Initial Setup
Begin with unboxing, referencing the user manual for package contents; then assemble the Hoover FH50150, preparing it for optimal hard floor cleaning performance․
Package Contents
Upon opening the box, carefully verify all components are present, consulting the detailed checklist within your Hoover FH50150 user manual․ You should find the main floor cleaner unit itself, alongside the quick clean tool for targeted spots․
Additionally, expect a sample size of cleaning solution, ensuring immediate usability․ The user manual outlines the importance of checking for the separate clean and dirty water tanks, plus any included accessories like extra brushes or specialized nozzles․
Confirm the presence of the power cord and the comprehensive user manual itself – essential for safe and effective operation!
Assembling the Hoover FH50150
The assembly process, clearly illustrated in your Hoover FH50150 user manual, is straightforward․ Begin by securely attaching the handle to the main unit, ensuring it clicks firmly into place․ Next, connect the clean and dirty water tanks – the manual emphasizes proper alignment for leak prevention․
If utilizing the quick clean tool, attach it to the designated port as shown in the diagrams․ Double-check all connections before proceeding, referencing the manual’s visual guide․ Proper assembly is crucial for optimal performance and longevity of your floor cleaner․
Filling the Clean and Dirty Water Tanks
Your Hoover FH50150 user manual details the tank filling procedure․ The clean water tank accepts warm tap water and Hoover’s cleaning solution – never use soap or detergents․ The manual specifies maximum fill lines to prevent overfilling and potential damage․
The dirty water tank is designed to collect the wastewater․ Ensure it’s securely in place before operation․ Regularly check both tanks during use, as the dirty water tank fills quickly․ Proper tank management, as outlined in the manual, ensures efficient cleaning․
Operating Instructions
The Hoover FH50150 user manual guides you through powering the device on/off, selecting appropriate wash modes, and utilizing the quick clean tool effectively․
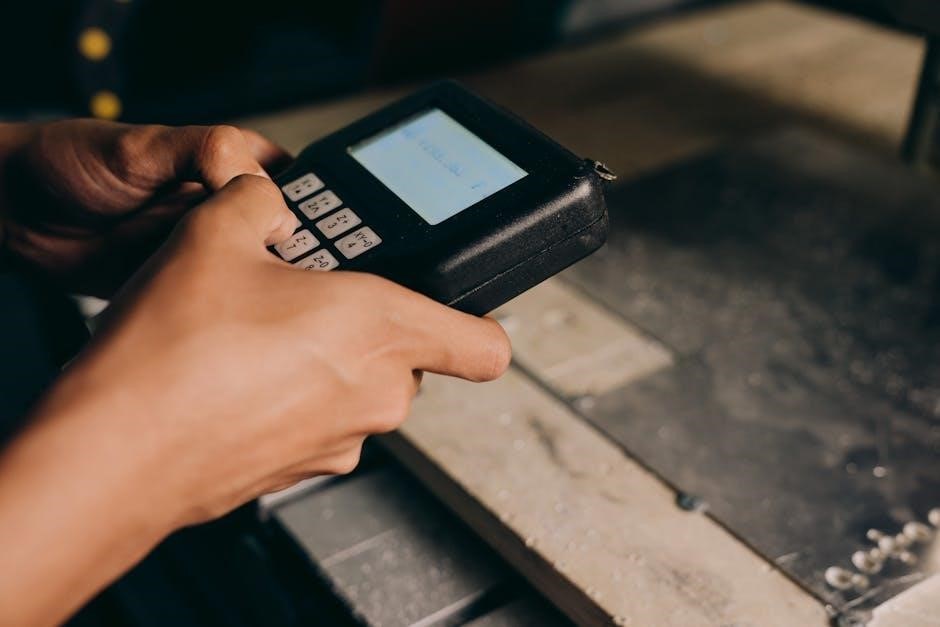
Powering On and Off
To begin operation with your Hoover FH50150, as detailed in the user manual, ensure the clean and dirty water tanks are properly installed and filled․ Locate the power button, typically found on the handle or main body of the machine․ Press the power button once to turn the unit on; a power indicator light will illuminate․
To power off the FH50150, simply press the power button again․ The indicator light will extinguish, confirming the device is off․ Always ensure the machine is completely powered down before performing any maintenance or storage procedures, as outlined in the comprehensive user guide․
Selecting Wash Modes
The Hoover FH50150, as explained in its user manual, offers multiple wash modes to cater to diverse flooring needs․ Typically, these include a ‘Quick Wash’ for light cleaning, a ‘Deep Clean’ for heavily soiled areas, and potentially an ‘Eco’ mode for water conservation․
Mode selection is usually achieved via dedicated buttons or a dial on the machine’s control panel․ Refer to the user manual for specific button layouts and mode descriptions․ Choosing the correct mode optimizes cleaning performance and extends the life of your FH50150․
Using the Quick Clean Tool
The Hoover FH50150’s user manual details the Quick Clean tool’s function – tackling spots and messes swiftly․ This specialized attachment, often stored onboard, is ideal for cleaning edges, stairs, and smaller areas that the main unit struggles to reach․
Attach the tool securely, select an appropriate wash mode, and use short, overlapping strokes․ The manual emphasizes avoiding excessive saturation to prevent streaks․ Regularly rinsing the tool during use maintains optimal cleaning efficiency, ensuring a spotless finish․

Maintenance and Cleaning
Regular maintenance, as outlined in the user manual, ensures peak performance of your Hoover FH50150; cleaning the brushroll and tanks is crucial for longevity․
Cleaning the Brushroll
To maintain optimal cleaning performance, regularly inspect and clean the brushroll of your Hoover FH50150․ Begin by disconnecting the machine from the power outlet for safety․ Locate the brushroll access door, typically on the bottom of the unit, and open it․ Gently remove the brushroll, being mindful of any trapped debris like hair or fibers․
Use scissors or a seam ripper to carefully cut away any tangled materials wrapped around the brushroll․ Rinse the brushroll thoroughly with warm water, ensuring all residue is removed․ Allow the brushroll to air dry completely before reinstalling it․ A clean brushroll guarantees effective scrubbing and spotless floors․
Emptying and Cleaning the Tanks
Maintaining hygiene is crucial; therefore, empty and clean both the clean and dirty water tanks after each use of your Hoover FH50150; Remove the tanks from the unit – they are designed for easy detachment․ Dispose of the dirty water responsibly, avoiding drain blockage․ Rinse both tanks thoroughly with warm water and a mild detergent․
Inspect the tanks for any buildup or residue and scrub as needed․ Ensure all soap residue is removed to prevent future contamination․ Allow the tanks to air dry completely before reattaching them to the machine․ Regular tank cleaning ensures optimal performance․
Filter Maintenance
Proper filter care is essential for maintaining the suction power and overall performance of your Hoover FH50150․ Regularly check the filter for debris and blockages – ideally after each use․ Remove the filter carefully, following the instructions in the user manual․ Rinse the filter thoroughly under cool water, gently removing any accumulated dirt or particles․
Allow the filter to air dry completely before reinstalling it․ Avoid using harsh chemicals or detergents, as these can damage the filter material․ Replace the filter periodically, as recommended in the manual, to ensure optimal cleaning efficiency․
Troubleshooting Common Issues
Addressing problems quickly ensures optimal performance․ Common issues like no power, poor suction, or leaking water are easily resolved with the user manual’s guidance․
No Power
If the Hoover FH50150 fails to power on, first verify the unit is securely plugged into a functioning electrical outlet․ Confirm the outlet is delivering power by testing it with another device․
Next, check the circuit breaker or fuse box to ensure the circuit hasn’t tripped or the fuse hasn’t blown․ Reset the breaker or replace the fuse if necessary․
Inspect the power cord for any visible damage, such as cuts or fraying․ A damaged cord presents a safety hazard and should not be used․ Refer to the user manual for guidance on obtaining a replacement cord․
Finally, ensure all components are properly assembled, as some models have safety mechanisms preventing operation if parts are missing or incorrectly attached․
Poor Suction
Reduced suction power in the Hoover FH50150 often indicates a blockage or maintenance issue․ Begin by thoroughly inspecting the brushroll for tangled hair, debris, or fibers, removing any obstructions found․
Next, check the clean water tank to ensure it isn’t overfilled, as this can restrict airflow․
Examine the dirty water tank; a full tank will significantly diminish suction․ Also, verify the filter is clean and properly installed, as a clogged filter severely limits airflow․ Refer to the user manual for filter cleaning instructions․
Inspect the hose and attachments for blockages as well․
Leaking Water
Water leakage with the Hoover FH50150 typically stems from improperly seated tanks or damaged components․ First, ensure both the clean and dirty water tanks are correctly aligned and securely latched into place․ Inspect the tank seals for any cracks or damage; replace if necessary․
Check the hose connections for tightness and ensure there are no visible punctures or breaks․
Verify the unit is positioned on a level surface during operation․ A tilted machine can cause spillage; If leaks persist, consult the user manual for detailed diagrams and troubleshooting steps, or contact Hoover customer support․

Advanced Features
The FH50150 boasts HeatBoost technology, a dual tank system for clean and dirty water, and effective edge cleaning – enhancing your floor care experience․
HeatBoost Technology
HeatBoost technology within the Hoover FH50150 elevates cleaning performance by delivering consistently heated water directly to the floor surface․ This feature isn’t simply about warming the water; it’s about maximizing the effectiveness of your cleaning solution․
Heated water helps to loosen and dissolve tough messes, grime, and sticky residues far more efficiently than cold or lukewarm water alone․ The user manual emphasizes utilizing this feature for optimal results on heavily soiled areas․ Maintaining a consistent temperature throughout the cleaning process ensures a deeper, more thorough clean, leaving your floors sparkling and sanitized․
Dual Tank System Explained
The FH50150’s dual tank system, as detailed in the user manual, separates clean and dirty water for a hygienic cleaning experience․ This prevents re-depositing dirty water and grime back onto your floors, ensuring a truly fresh clean․ The clean water tank holds your cleaning solution, while the dirty water tank captures the lifted dirt and debris․
This separation is crucial for maintaining cleanliness and preventing cross-contamination․ Regularly emptying the dirty water tank, as instructed in the manual, is essential for optimal performance and sanitation․ The system simplifies the cleaning process and delivers superior results․
Edge Cleaning Capabilities
The Hoover FH50150, according to the user manual, excels at cleaning along edges and baseboards․ Its specialized design allows the cleaning head to reach close to walls, effectively removing dirt and grime from hard-to-reach areas․ This feature minimizes the need for separate detailing with traditional mops or brushes․
The manual highlights how the FH50150’s brushroll extends close to the edge, ensuring thorough cleaning․ This is particularly useful in kitchens, bathrooms, and hallways where dirt tends to accumulate along the perimeter of the room, providing a polished finish․

Safety Precautions
Always disconnect the Hoover FH50150 from power before maintenance, as detailed in the user manual, and follow proper usage guidelines for safe operation․
Electrical Safety
To ensure safe operation of your Hoover FH50150, always verify the power cord is undamaged before each use, as outlined in the user manual․ Never operate the device with a damaged cord or plug․ Avoid using extension cords; if necessary, use a heavy-duty extension cord rated for the appliance’s power requirements․
Do not immerse the machine, cord, or plug in water or other liquids․ Unplug from the outlet when not in use and before performing any maintenance․ Handle the plug and cord with care to prevent electrical shock․ Keep the cord away from heated surfaces and sharp edges․
Proper Usage Guidelines
For optimal performance and longevity of your Hoover FH50150, always refer to the user manual․ Use only Hoover-approved cleaning solutions to prevent damage to internal components․ Before cleaning, remove loose debris and large particles from the floor surface․ Avoid operating the machine on carpets or rugs, as it’s designed for hard floors․
Ensure the dirty water tank is properly secured before operation to prevent leaks․ Do not leave the machine unattended while in use․ Always start with the lowest wash mode and adjust as needed for your floor type․
Storage Instructions
To ensure the longevity of your Hoover FH50150, proper storage is crucial․ Before storing, always empty and thoroughly clean both the clean and dirty water tanks, as detailed in the user manual․ Remove and dry the brushroll to prevent mildew or odors․
Store the unit in a cool, dry place, away from direct sunlight and extreme temperatures․ Ensure the power cord is neatly coiled and secured․ Keep the machine upright to prevent any residual water from damaging internal components․

Technical Specifications
The FH50150’s dimensions and weight, alongside its power requirements and tank capacity, are outlined in the user manual for detailed product information․
Dimensions and Weight
Understanding the physical characteristics of your Hoover FH50150 is crucial for storage and maneuverability․ While precise dimensions aren’t explicitly stated in the provided snippets, the user manual will contain these vital measurements․ Expect a weight that allows for easy handling during cleaning sessions, though specifics require consulting the official documentation․
Knowing the device’s size helps determine if it fits comfortably within your storage space and if it’s suitable for navigating tight areas in your home․ The user manual provides these details, ensuring a seamless cleaning experience tailored to your environment․
Power Requirements
Ensuring correct power supply is vital for optimal performance and safety of your Hoover FH50150․ The user manual details the specific voltage and amperage requirements for operation․ Typically, these types of appliances operate on standard household current, but verifying these details within the manual is essential before first use․
Incorrect voltage can damage the machine, voiding the warranty․ Always check the power outlet and ensure it’s properly grounded․ The manual will also outline any specific power cord considerations for safe and efficient operation, preventing potential hazards․
Tank Capacity
Understanding the tank capacities of your Hoover FH50150 is crucial for efficient cleaning, as detailed in the user manual․ This model features separate tanks for clean and dirty water, optimizing performance and hygiene․ The clean water tank’s capacity allows for extended cleaning sessions before refilling is needed․
The dirty water tank’s size indicates how much debris the machine can hold, preventing overflows․ Regularly checking and emptying the dirty water tank, as outlined in the manual, maintains suction and cleaning effectiveness․ Knowing these capacities maximizes cleaning power․

Warranty Information
The Hoover FH50150 comes with a warranty, details found in the user manual, covering defects in materials and workmanship for a specified period․
Warranty Coverage Details
The Hoover FH50150’s warranty, as outlined in the user manual, typically covers defects in materials and workmanship under normal household use․ This protection extends for a defined timeframe from the original purchase date, often one or two years․ Coverage includes repairs or replacement of defective parts, at Hoover’s discretion․
However, the warranty doesn’t cover issues arising from misuse, abuse, commercial use, unauthorized repairs, or normal wear and tear․ Damage caused by accidents, alterations, or external factors is also excluded․ Proof of purchase is essential for any warranty claim, so retain your receipt!
How to Claim Warranty
To initiate a warranty claim for your Hoover FH50150, as detailed in the user manual, first gather your proof of purchase – the original receipt or sales invoice․ Contact Hoover’s customer support team via phone or their website, providing your model number and a detailed description of the issue․
They will likely guide you through troubleshooting steps and may request photos or videos of the defect․ If a repair or replacement is approved, Hoover will provide instructions for shipping the unit or arranging a service appointment․ Remember to retain all communication records!

Hoover FH50150 vs․ Competitors
Compared to similar models, the FH50150 stands out with its HeatBoost technology and dual tank system, offering a superior cleaning experience for users․
Comparison with Similar Models
When evaluating the Hoover FH50150 against competing hard floor cleaners, several key distinctions emerge․ Many alternatives rely solely on washing and drying, lacking the FH50150’s integrated vacuum function for simultaneous dry debris removal․ This “Triple Action” – vacuuming, washing, and squeegeeing – provides a more comprehensive clean․
Furthermore, models without a dedicated heat function often struggle with stubborn stains․ The FH50150’s HeatBoost technology actively warms the cleaning solution, enhancing its effectiveness․ While some competitors offer similar tank systems, the FH50150’s dual-tank design keeps clean and dirty water separate, preventing re-deposition of grime․
Advantages of Choosing FH50150
Opting for the Hoover FH50150 delivers significant benefits for hard floor care․ Its integrated vacuuming, washing, and drying system streamlines cleaning, eliminating the need for separate steps․ The HeatBoost technology effectively tackles stubborn messes, while the dual-tank system ensures consistently clean water is applied․
Compared to traditional mopping, the FH50150 offers superior hygiene and efficiency․ User feedback highlights its ability to leave floors noticeably cleaner and drier, reducing drying time․ The quick clean tool adds versatility, making it ideal for spot cleaning and smaller areas․