Honeywell TH8321R1001 Installation Manual PDF: Article Plan
This article details the Honeywell TH8321R1001 thermostat, covering installation, setup, and troubleshooting. It guides users through accessing the PDF manual and utilizing RedLINK features.
We’ll explore specifications, wiring, and programming, ensuring efficient temperature control in residential and commercial spaces. Remote access options are also discussed.
Find guides, manuals, and support resources for the VisionPRO 8000 Series, enabling optimal performance and user experience with this advanced thermostat.
The Honeywell TH8321R1001 is a sophisticated, programmable thermostat designed to deliver precise and efficient temperature regulation for both residential and commercial environments. As part of the VisionPRO 8000 series, this thermostat represents a significant advancement in home comfort technology, offering a user-friendly touchscreen interface and a wealth of customizable features.
This thermostat isn’t simply a temperature controller; it’s a central hub for managing your home’s climate. It allows for detailed scheduling, optimizing energy usage and reducing utility costs. The TH8321R1001 distinguishes itself through its compatibility with the RedLINK system, enabling optional remote monitoring and control via the RedLINK Internet Gateway. This feature empowers users to adjust settings from anywhere with an internet connection, providing unparalleled convenience and peace of mind.
Understanding the capabilities of the TH8321R1001 begins with accessing the comprehensive documentation available, including the detailed installation manual in PDF format. This manual provides step-by-step instructions, wiring diagrams, and troubleshooting guidance, ensuring a smooth and successful installation process; Whether you’re a seasoned DIY enthusiast or a first-time thermostat installer, the readily available resources will prove invaluable.
Understanding the VisionPRO 8000 Series

The Honeywell VisionPRO 8000 series represents a leap forward in smart home climate control, and the TH8321R1001 is a flagship model within this innovative line. This series is characterized by its intuitive touchscreen displays, providing a clear and interactive user experience. Beyond basic temperature adjustments, the VisionPRO 8000 thermostats offer advanced scheduling capabilities, allowing homeowners to create customized comfort profiles tailored to their lifestyles.
A key differentiator of the VisionPRO 8000 series is its seamless integration with Honeywell Home’s ecosystem. This includes compatibility with RedLINK, a proprietary wireless communication protocol, and the optional RedLINK Internet Gateway. This gateway unlocks remote access and control via smartphone or tablet, extending convenience beyond the walls of your home.
The series is designed for ease of installation and use, but accessing the detailed PDF manual is crucial for maximizing its potential. These manuals provide comprehensive wiring diagrams, troubleshooting steps, and explanations of advanced features. Understanding the broader VisionPRO 8000 framework allows users to fully leverage the TH8321R1001’s capabilities and enjoy a truly connected and comfortable home environment.
Key Features and Benefits
The Honeywell TH8321R1001 boasts a wealth of features designed to enhance home comfort and energy efficiency. Its vibrant touchscreen display simplifies operation, offering intuitive control over heating and cooling systems. Programmable scheduling allows for customized temperature settings throughout the day, optimizing energy usage and reducing utility bills.
A significant benefit is RedLINK connectivity, enabling wireless communication with compatible Honeywell Home devices. When paired with the RedLINK Internet Gateway, users gain remote access and control via a smartphone app, providing convenience and peace of mind. This allows for adjustments from anywhere, ensuring a comfortable home environment upon arrival.
The thermostat’s advanced capabilities extend to system diagnostics and alerts, notifying users of potential issues. Accessing the detailed installation manual PDF unlocks these features, providing step-by-step guidance for setup and troubleshooting. Ultimately, the TH8321R1001 delivers a sophisticated and user-friendly experience, maximizing comfort and minimizing energy consumption.
Technical Specifications
The Honeywell TH8321R1001 operates on a standard 24VAC power supply, ensuring compatibility with most residential heating and cooling systems. It supports a wide range of system types, including forced air, heat pump, and radiant heat. The thermostat’s operating temperature range is 32°F to 104°F (0°C to 40°C), with humidity operating range of 0-95% non-condensing.
Display resolution is a clear and vibrant touchscreen, enhancing usability. Communication protocols include RedLINK wireless, facilitating seamless integration with other Honeywell Home devices. The unit’s dimensions are approximately 4.7 x 4.7 x 1.2 inches, allowing for easy installation in various locations.
Detailed specifications, including wiring diagrams and compatibility charts, are readily available within the comprehensive installation manual PDF. This document outlines precise electrical requirements and system limitations, ensuring a successful and safe installation. Understanding these technical details is crucial for optimal performance and longevity of the thermostat.
Package Contents
Upon opening the Honeywell TH8321R1001 package, you should find the VisionPRO 8000 thermostat unit itself, designed with a user-friendly touchscreen interface. Included is a mounting plate, essential for securely attaching the thermostat to the wall. Screws and wall anchors are provided for a stable installation, accommodating various wall types.

A detailed installation manual is a key component, offering step-by-step instructions and wiring diagrams. Wire labels are also included, simplifying the connection process and minimizing errors. These labels clearly identify each wire for easy reference during installation.
The package also contains quick reference guides, providing a concise overview of the thermostat’s features and basic operations. Access to the full PDF manual online is detailed within the printed materials. Verify all components are present before beginning installation, referencing the contents list in the manual for confirmation.
Safety Precautions
Before commencing installation of the Honeywell TH8321R1001, always disconnect power to your heating and cooling system at the breaker box. This crucial step prevents electrical shock and ensures a safe working environment. Failure to do so could result in serious injury or damage to the equipment.
Exercise caution when handling wiring, and never work with live wires. If you are uncomfortable with electrical work, consult a qualified HVAC technician. Improper wiring can lead to system malfunction or create a fire hazard; Always double-check connections before restoring power.
Read and understand the complete installation manual before beginning. Pay close attention to all warnings and cautions outlined within the PDF document. Ensure the thermostat is installed in a location that is not exposed to direct sunlight, extreme temperatures, or moisture. Proper installation is vital for safe and reliable operation.
Tools Required for Installation
Successfully installing the Honeywell TH8321R1001 thermostat requires a few essential tools. A Phillips head screwdriver is necessary for mounting the thermostat base and securing wiring connections. A flathead screwdriver may also be useful for certain terminal screws.

A wire stripper/cutter is crucial for preparing the thermostat wires, ensuring clean and secure connections. A small level will help ensure the thermostat is mounted straight for aesthetic appeal and accurate readings. A digital multimeter is highly recommended for verifying power is off and testing wire continuity.
Depending on your existing wiring, you might need pliers for bending or manipulating wires. A pencil is useful for marking wires before disconnecting them from the old thermostat. Access to the Honeywell TH8321R1001 installation manual PDF will provide a detailed list and visual aids, ensuring you have everything needed for a smooth installation process.
Wiring Diagram Overview
The Honeywell TH8321R1001 wiring diagram is a critical component of a successful installation. The manual PDF provides detailed schematics illustrating the connections for various heating and cooling systems, including conventional, heat pump, and gas furnace setups.
Common terminals include Rh and Rc for 24V power, W for heat, Y for cooling, and G for the fan. A C-wire (common wire) is often required for consistent power, especially with newer systems and RedLINK functionality. The diagram clearly labels each wire and its corresponding terminal.
Understanding the wiring configuration is essential for avoiding errors that could damage the thermostat or your HVAC system. The PDF manual offers multiple wiring examples, catering to different system types. Carefully compare your existing wiring to the diagram before disconnecting any wires. Proper wiring ensures accurate temperature control and optimal system performance. Referencing the manual’s visual aids is highly recommended.
C-Wire Requirement and Installation
The Honeywell TH8321R1001 often requires a C-wire (common wire) for reliable operation, particularly when utilizing its advanced features like Wi-Fi connectivity and consistent display power. Many older systems lack a dedicated C-wire, necessitating an adapter or running a new wire.
The installation manual PDF provides detailed instructions on identifying if a C-wire exists and how to install one if absent. A C-wire provides continuous 24VAC power, preventing issues like flickering displays or intermittent thermostat operation. Adapters can repurpose existing wires, but may not be suitable for all systems.
If installing a new C-wire, it’s crucial to turn off power to the HVAC system at the breaker. The manual clearly illustrates the wiring process, emphasizing safety precautions. Incorrect C-wire installation can damage the thermostat or HVAC equipment. Always consult a qualified HVAC technician if unsure about any aspect of the wiring process.
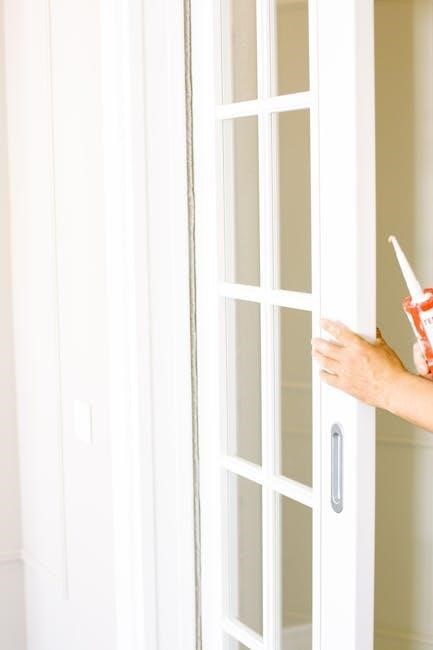
Thermostat Mounting and Installation
The Honeywell TH8321R1001 installation begins with carefully removing the old thermostat and labeling the existing wires. The provided manual PDF offers a clear wiring diagram, crucial for correctly connecting the wires to the new thermostat’s terminals. Ensure the HVAC system’s power is completely off at the breaker before proceeding.
Mounting the thermostat baseplate requires using appropriate screws and anchors, ensuring a secure and level installation. The manual details the correct screw size and placement. Once the baseplate is mounted, connect the labeled wires to their corresponding terminals, double-checking for accuracy.
After wiring, carefully attach the thermostat display to the baseplate. The manual provides step-by-step instructions and diagrams. A proper fit is essential for reliable operation. Finally, restore power to the HVAC system and verify the thermostat powers on correctly. The PDF manual emphasizes safety throughout the mounting process.
Initial Power-Up and Setup
Upon restoring power to the Honeywell TH8321R1001, the thermostat will initiate a startup sequence. The display will illuminate, guiding you through the initial setup process. The downloadable PDF manual provides detailed screenshots and explanations for each step. Expect a series of prompts to configure basic settings.
The thermostat will likely ask you to select your HVAC system type – furnace, heat pump, or others. Accurate selection is vital for proper operation. Next, you’ll be prompted to configure your system’s heating and cooling stages. The manual offers guidance on identifying these stages.
Follow the on-screen instructions to complete the initial setup. This includes verifying the wiring configuration and setting preferences. The PDF manual highlights the importance of accurate information input during this phase. Successful completion of the setup ensures optimal performance and access to all thermostat features.
Programming Basic Settings
The Honeywell TH8321R1001 allows for extensive customization of your home’s temperature control. Accessing the programming menu, detailed in the downloadable PDF manual, unlocks these features. Begin by navigating to the ‘Settings’ option on the touchscreen interface. Here, you can adjust various parameters to optimize comfort and energy savings.
Key basic settings include fan operation modes – ‘Auto’ or ‘On’ – and temperature display units (Fahrenheit or Celsius). The manual provides clear instructions on modifying these settings. You can also configure swing settings, which control the temperature range around the setpoint. Experimenting with these settings can fine-tune your comfort levels.
The PDF manual emphasizes the importance of understanding each setting before modification. Incorrect configurations can lead to suboptimal performance. Take time to review the explanations and screenshots provided in the manual. Properly programmed basic settings lay the foundation for creating customized heating and cooling schedules.
Setting Date and Time
Accurate date and time settings are crucial for the Honeywell TH8321R1001’s scheduling functions to operate correctly. The downloadable PDF manual provides a step-by-step guide to configuring these parameters. Access the ‘Settings’ menu on the thermostat’s touchscreen, then select the ‘Date/Time’ option. You’ll be presented with fields to input the current date, month, and year.
Similarly, you can set the current time, including hours and minutes. The manual details how to toggle between 12-hour and 24-hour time formats. Ensure the time is synchronized with your local time zone for accurate scheduling. Incorrect date or time settings will result in heating or cooling occurring at unintended times.
The PDF manual highlights the importance of verifying these settings after initial installation and after any power outages. Regularly checking the date and time ensures consistent and reliable operation of your thermostat’s programmed schedules. Proper timekeeping is fundamental to maximizing energy efficiency and comfort.

Configuring Heating and Cooling Schedules

The Honeywell TH8321R1001 excels in programmable scheduling, allowing customized heating and cooling based on your lifestyle. The detailed PDF manual guides users through creating personalized schedules. Access the ‘Schedule’ menu on the thermostat’s touchscreen. You can define different periods – ‘Wake,’ ‘Leave,’ ‘Return,’ and ‘Sleep’ – with unique temperature settings for each day of the week.
The manual explains how to set different schedules for weekdays and weekends, optimizing comfort and energy savings. You can also create temporary holds, overriding the programmed schedule for specific events or absences. The thermostat supports multiple heating and cooling stages, allowing for precise temperature control.
The PDF manual provides clear instructions on copying schedules to multiple days, simplifying the setup process. Experiment with different settings to find the optimal balance between comfort and energy efficiency. Properly configured schedules significantly reduce energy consumption and lower utility bills.
RedLINK Enabled Features
The Honeywell TH8321R1001 leverages RedLINK, a proprietary wireless communication protocol, unlocking a suite of advanced features. The installation manual PDF details how RedLINK simplifies connecting compatible Honeywell Home devices, such as sensors and internet gateways, without complex wiring. RedLINK enables remote monitoring and control via the optional RedLINK Internet Gateway, allowing adjustments from anywhere using a smartphone or computer.
The manual explains how to pair RedLINK devices securely, ensuring a reliable connection. This connectivity facilitates advanced functionalities like smart alerts, notifying you of temperature fluctuations or system issues. RedLINK also supports zoning systems, allowing independent temperature control in different areas of your home.
The PDF manual provides troubleshooting tips for RedLINK connectivity issues, ensuring seamless operation. Explore the benefits of a connected home ecosystem with RedLINK, enhancing comfort, convenience, and energy management. RedLINK simplifies expansion and integration with other Honeywell Home products;
Remote Access via RedLINK Internet Gateway
The Honeywell TH8321R1001’s remote access capabilities, detailed in the installation manual PDF, are enabled through the RedLINK Internet Gateway. This gateway connects your thermostat to your home’s Wi-Fi network, granting control via the Honeywell Home mobile app or web portal. The manual guides users through the gateway’s setup process, including network configuration and account creation.
Once connected, you can adjust temperature settings, view current conditions, and manage schedules remotely. Receive alerts for extreme temperatures or system malfunctions, even when away from home. The PDF manual illustrates how to utilize the app’s features for optimal control and energy savings.
Remote access simplifies vacation mode setup, ensuring energy efficiency while you’re away. Troubleshooting sections within the manual address common connectivity issues. Enjoy the convenience of a connected home, managing your comfort from anywhere with the RedLINK Internet Gateway and the Honeywell TH8321R1001.
Troubleshooting Common Issues
The Honeywell TH8321R1001 installation manual PDF dedicates a significant section to troubleshooting common problems. It addresses issues like thermostat display malfunctions, inaccurate temperature readings, and connectivity problems with the RedLINK system; The manual provides step-by-step guidance for diagnosing and resolving these issues, often starting with simple checks like battery levels and wiring connections.
Common concerns, such as the thermostat not responding or failing to connect to the internet gateway, are thoroughly explained. Detailed diagrams assist in identifying wiring errors, a frequent cause of operational issues. The PDF also covers scenarios where the heating or cooling system doesn’t respond to thermostat commands.
For more complex problems, the manual directs users to Honeywell’s support resources. It emphasizes the importance of safety precautions when inspecting wiring or components. By following the troubleshooting steps outlined in the manual, users can often resolve issues independently, minimizing downtime and potential service calls.
Resetting the Thermostat
The Honeywell TH8321R1001 installation manual PDF clearly outlines the procedure for resetting the thermostat to factory default settings. This is useful when experiencing persistent issues that cannot be resolved through standard troubleshooting, or when preparing the thermostat for a new installation. The manual details both a soft reset, which preserves some user settings, and a hard reset, which restores the thermostat to its original factory state.
The hard reset process typically involves accessing a hidden menu through a specific sequence of button presses on the thermostat’s touchscreen. The manual provides precise instructions and diagrams illustrating this process. It cautions users that a hard reset will erase all programmed schedules, preferences, and RedLINK gateway connections.
Before performing a reset, the manual recommends backing up any critical settings if possible. Following a reset, users will need to reconfigure the thermostat, including setting the date, time, and desired heating/cooling schedules. The PDF manual serves as a crucial guide throughout this re-configuration process.
Downloading the PDF Manual
Accessing the Honeywell TH8321R1001 installation manual PDF is straightforward, offering a comprehensive resource for installation, programming, and troubleshooting. Several online sources provide direct download links to the official PDF document. Honeywell Home’s official website is a primary source, often hosting the latest version of the manual. Numerous third-party websites specializing in appliance manuals also archive the PDF, offering alternative download options.
A quick online search for “Honeywell TH8321R1001 manual PDF” will yield numerous results. Users should verify the source’s legitimacy to ensure they are downloading a genuine, virus-free copy. The PDF typically contains around 72 to 144 pages, detailing every aspect of the thermostat’s operation. It’s a valuable asset for both professional installers and DIY enthusiasts.
Downloading the manual allows offline access to critical information, eliminating the need for an internet connection during installation or troubleshooting. The PDF format ensures compatibility across various devices, including computers, tablets, and smartphones.
Where to Find Additional Support
Beyond the Honeywell TH8321R1001 installation manual PDF, several avenues offer further assistance. The Honeywell Home support website provides a wealth of resources, including FAQs, troubleshooting guides, and video tutorials. A dedicated support forum allows users to connect with other owners and share experiences, offering peer-to-peer assistance.
Honeywell’s customer service team is available via phone and email, providing direct support for complex issues. Authorized Honeywell dealers and installers can offer professional installation and troubleshooting services. Online communities and forums dedicated to home automation often feature discussions about the TH8321R1001, providing valuable insights.
YouTube channels specializing in HVAC systems frequently showcase installation and programming tutorials for this thermostat. Checking online retailers like Amazon or Home Depot’s Q&A sections can reveal common issues and solutions shared by other customers. Utilizing these resources ensures a smooth and successful experience with your Honeywell thermostat.
Warranty Information
The Honeywell TH8321R1001 thermostat is backed by a limited warranty, protecting against defects in materials and workmanship. Typically, this warranty covers the product for one year from the date of purchase, though specific terms may vary. Proof of purchase, such as a receipt or invoice, is required to make a warranty claim.

The warranty covers repair or replacement of the defective product at Honeywell’s discretion. It does not cover damage resulting from improper installation, misuse, abuse, or unauthorized modifications. Damage caused by power surges or acts of nature is also typically excluded.
To initiate a warranty claim, contact Honeywell’s customer support team. Detailed warranty information is included within the TH8321R1001 installation manual PDF and on the Honeywell Home website. Reviewing these documents will clarify the scope of coverage and the claim process. Registering your product online can streamline the warranty process.