
Craftsman Garage Door Opener Installation Manual: A Comprehensive Guide
Embark on a seamless installation journey with this detailed manual, covering Craftsman openers, from initial checks to final testing, ensuring a secure and functional system.
Understanding Your Craftsman Garage Door Opener
Your Craftsman garage door opener is a sophisticated electromechanical system designed for convenience and security. Familiarize yourself with its core components: the motor unit, rail, door bracket, and safety sensors. Different models offer varying features, such as belt drive versus chain drive, horsepower, and smart home integration.
Recent Craftsman openers prioritize reliability and performance, reflecting Stanley Black & Decker’s commitment to quality. Understanding the basics of operation – how the opener connects to the door, interprets remote signals, and utilizes safety mechanisms – is crucial before beginning installation. Knowing your specific model number, often found on a sticker on the motor unit, will help you access model-specific resources and troubleshooting guides. Remember, proper understanding leads to a safer and more efficient installation process.
Safety Precautions Before Installation
Prioritize safety throughout the entire installation process. Disconnect the power supply to the garage door opener circuit at the breaker box before commencing any work. Garage doors are under significant spring tension; do not attempt to disassemble or adjust the springs yourself – this requires a qualified professional.
Wear safety glasses to protect your eyes from falling debris. Use a sturdy ladder and ensure it’s securely positioned. Keep children and pets away from the work area; Be mindful of pinch points during installation, particularly when handling the door and rail components. Never work alone; having an assistant can significantly enhance safety. Always refer to the complete manual for detailed safety guidelines specific to your Craftsman model. Ignoring these precautions could result in serious injury.
Tools Required for Installation
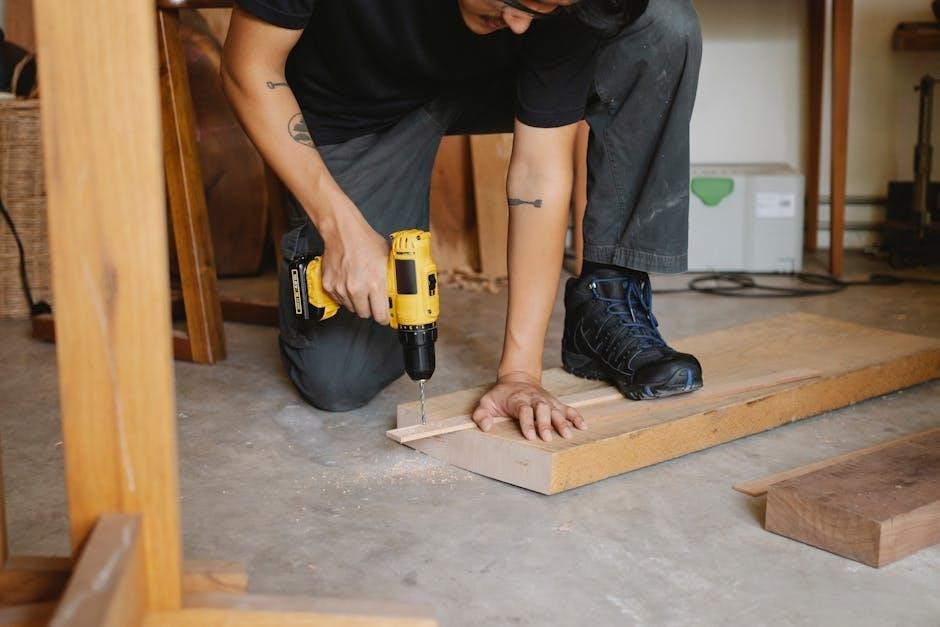
Gather the necessary tools before beginning the installation to ensure a smooth process. You will need a Phillips head screwdriver, a flathead screwdriver, and an adjustable wrench. A socket wrench set with various sizes is also essential. A drill with assorted drill bits will be required for mounting brackets.
Additionally, a level is crucial for ensuring proper alignment. A measuring tape will help with accurate positioning. Safety glasses and work gloves are highly recommended for personal protection. A ladder is needed to reach the header bracket. Wire strippers and wire connectors are necessary for electrical connections. A voltage tester will confirm power is off. Having these tools readily available will streamline the installation and minimize delays.
Unboxing and Inventory of Parts
Carefully unpack the Craftsman garage door opener kit and lay out all components on a protected surface. Cross-reference the parts list included in the manual with the actual contents of the box. This ensures you have everything needed before starting.
Identify the opener unit, rail sections, motor unit, door bracket, safety sensors, remote controls, and all mounting hardware (bolts, nuts, washers). Check for any damage during shipping. Note the quantity of each item. Missing parts should be reported to the retailer immediately. A complete inventory prevents frustrating interruptions during installation. Retain the packaging until the installation is finished and verified to be successful.

Preparing for Installation
Prior to commencing, ensure the garage door is balanced, space is clear, and necessary reinforcements are in place for a safe, efficient setup.
Checking Garage Door Balance
Before installing your Craftsman garage door opener, verifying the door’s balance is crucial for safety and proper operation. Disconnect the door from the existing opener (if applicable) by pulling the emergency release cord. Manually lift the door halfway. It should remain stationary; if it rises or falls, adjustments are needed.
Inspect the springs – torsion springs above the door or extension springs on the sides. Do not attempt to adjust torsion springs yourself; this requires professional expertise due to the high tension involved. For extension springs, ensure they are equally stretched and that the cables are not frayed. If adjustments are necessary, or if you’re uncomfortable performing this check, contact a qualified garage door technician. An unbalanced door can cause significant damage to the opener and pose a safety hazard.
Reinforcing the Garage Door (If Necessary)
Assess your garage door’s structural integrity before installation. Older or lightweight doors may require reinforcement to withstand the added stress of an automatic opener. Examine the door panels for any signs of weakness, rot, or damage. Pay close attention to the hinges and tracks, ensuring they are securely fastened and in good condition.
If reinforcement is needed, consider adding vertical supports or replacing weak panels with sturdier materials. Strengthening the header above the door opening is also vital, particularly if it’s constructed from softwood. Use appropriate lumber and hardware to reinforce the header, ensuring it can adequately support the opener’s weight and the forces exerted during operation. A properly reinforced door ensures safe and reliable performance of your Craftsman opener.
Clearing the Garage Space
Prior to commencing installation, a completely clear workspace is paramount for safety and efficiency. Remove all vehicles, tools, equipment, and stored items from the garage. This includes anything hanging from the ceiling, such as storage racks or lighting fixtures, that could interfere with the installation process or pose a hazard.
Ensure ample space around the garage door itself, allowing unobstructed access for maneuvering the opener unit, rail sections, and other components. Cover or protect any remaining items that cannot be removed to prevent dust or accidental damage. A clean and organized workspace minimizes risks and streamlines the installation, contributing to a smoother and more successful outcome. Safety is key – a clutter-free environment prevents trips, falls, and potential injuries.

Installation Steps
Begin by securely mounting the opener unit, then attach the rail to the header bracket, connecting it firmly to the unit for stable operation.
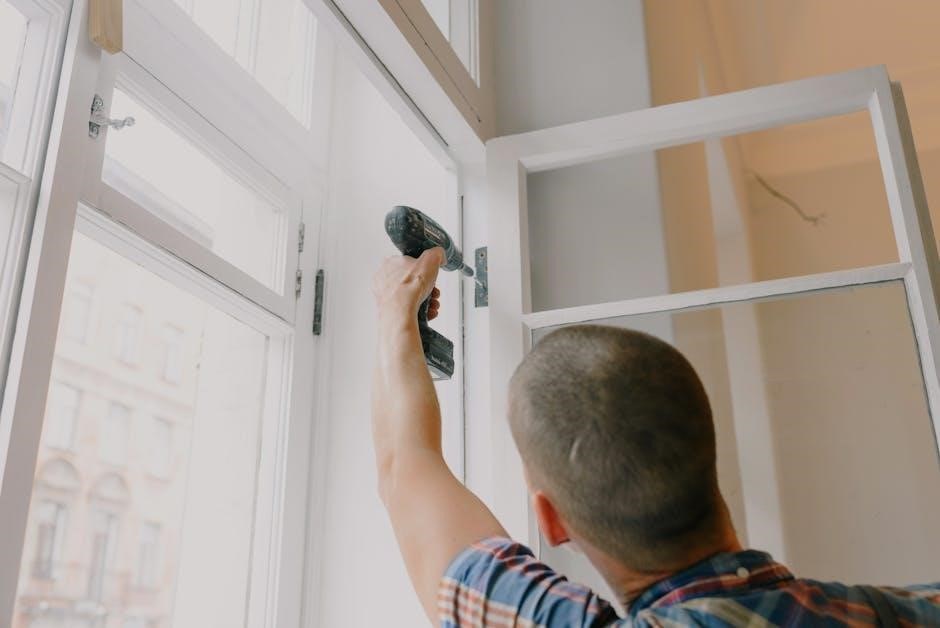
Mounting the Garage Door Opener Unit
Carefully position the garage door opener unit, ensuring ample headroom and accessibility for adjustments. Utilize the provided mounting brackets, securely attaching them to ceiling joists or a reinforced header. Confirm the brackets are level and firmly fastened to support the unit’s weight and operational vibrations.
Prior to fully tightening, double-check alignment with the garage door’s travel path. Incorrect positioning can lead to operational issues or damage. Employ appropriate hardware – lag screws are generally recommended for secure attachment to wood structures, while concrete anchors are necessary for concrete ceilings.
Ensure the unit is centered above the door to facilitate even force distribution. A misaligned opener can strain the door and opener mechanism. Once satisfied with the positioning, fully tighten all mounting hardware, verifying stability before proceeding to the next installation phase.
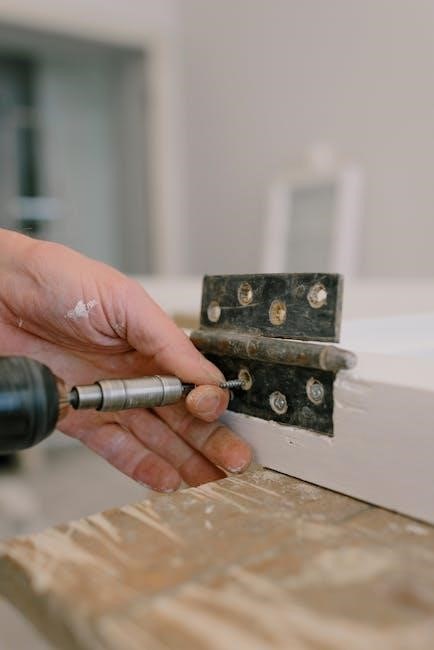
Attaching the Rail to the Header Bracket
Begin by aligning the garage door opener rail sections, ensuring smooth connectivity for uninterrupted travel. Securely attach the rail to the header bracket using the supplied bolts and nuts, tightening them firmly but not excessively. Over-tightening can potentially damage the bracket or rail components.
Verify the rail is level and properly aligned with the opener unit, as misalignment can cause binding or operational inefficiencies. Utilize a level to confirm horizontal alignment throughout the rail’s length. Pay close attention to any pre-drilled holes designed for specific bracket attachments.
Double-check all connections, ensuring bolts are fully engaged and tightened. A loose connection can lead to instability and potential safety hazards during operation. Once securely fastened, gently test the rail’s stability before proceeding to connect it to the opener unit itself.
Connecting the Rail to the Opener Unit
Carefully maneuver the assembled rail towards the opener unit, aligning the rail’s end connector with the corresponding slot on the motor unit. Insert the connector firmly, ensuring a secure and stable connection. Some models may utilize a locking pin or clip – confirm its proper engagement.
Utilize the provided hardware – typically bolts and washers – to further secure the rail to the opener unit. Tighten these fasteners gradually and evenly, avoiding excessive force that could strip threads or damage the housing. A snug fit is crucial for reliable operation.
Inspect the connection from multiple angles, verifying there’s no wobble or play. A solid connection prevents operational noise and ensures efficient power transfer. Gently test the rail’s stability by applying slight pressure; it should remain firmly attached to the opener unit.
Installing the Motor Unit
Position the Craftsman garage door opener motor unit centrally above the door’s tracks, ensuring adequate clearance for operation and future maintenance. Utilize the pre-drilled holes in the mounting bracket as guides for secure attachment to the ceiling joists.
Employ lag screws and washers – sized appropriately for your ceiling structure – to firmly fasten the mounting bracket. Prioritize solid wood joists; if attaching to drywall, use appropriate anchors rated for the unit’s weight. Double-check bracket stability before proceeding.
Carefully lift and align the motor unit with the mounted bracket, sliding it into place. Secure the unit to the bracket using the provided bolts, tightening them firmly. Verify the unit is level and securely fastened, preventing vibrations during operation.
Connecting the Door
Securely link your garage door to the opener via brackets and an arm, enabling smooth and reliable operation, crucial for automated access and convenience.
Attaching the Door Bracket
Begin by selecting the appropriate door bracket from your kit, ensuring it matches your garage door’s construction and track style. Position the bracket on the door, typically centered and at a height that allows for proper arm alignment with the opener unit.
Secure the bracket using the provided bolts, nuts, and washers, tightening them firmly but avoiding over-tightening which could damage the door panel. Double-check the bracket’s stability; it must withstand the force of the opener during operation.
Consider reinforcing the door if necessary, especially for heavier doors, to prevent stress fractures around the bracket mounting points. Proper bracket attachment is fundamental for smooth, safe, and reliable garage door operation, preventing issues like misalignment or disconnection.
Connecting the Door Arm to the Door
Align the door arm with the previously installed door bracket, ensuring a smooth and secure connection point. Insert the connecting pin or bolt through both the arm and the bracket, utilizing the provided hardware – washers and cotter pins are crucial for safety.
Verify the arm’s positioning allows for unrestricted door movement throughout its entire range of motion, avoiding any binding or interference with the tracks or other components. A slight arc in the arm is normal, facilitating the door’s lift.
Tighten all connections firmly, but avoid over-tightening, which could compromise the integrity of the arm or bracket. This connection is vital for transferring the opener’s power to lift and lower the door efficiently and safely.
Adjusting Door Travel Limits
Precisely set the up and down travel limits using the adjustment screws located on the opener unit; these control how far the door opens and closes. Begin by loosening the locking nuts on the adjustment screws before making any changes.
Gradually adjust the screws in small increments, testing the door’s movement after each adjustment. Observe the door’s full range of motion, ensuring it doesn’t hit the ceiling or fall short of a fully open position.
Securely tighten the locking nuts once the desired travel limits are achieved, preventing accidental adjustments. Proper limit settings are crucial for safe and reliable operation, preventing damage to the door or opener.

Electrical Connections
Carefully connect the safety sensors and the opener to a grounded power source, strictly adhering to local electrical codes for a safe and functional setup.
Wiring the Safety Sensors
Essential for safety, the wiring of your Craftsman garage door opener’s safety sensors requires meticulous attention. Begin by connecting the sensor wires to the designated terminals on the opener unit – typically labeled as “safety sensor” or similar. Ensure a secure connection, avoiding loose wires which can compromise functionality.
The sensors themselves must be positioned close to the garage floor, facing each other across the door’s path. Proper alignment is crucial; if misaligned, the system won’t recognize obstructions. Run the wiring neatly, securing it to prevent accidental damage or interference.
Double-check all connections before proceeding. Incorrect wiring can lead to the opener malfunctioning or, more importantly, failing to prevent the door from closing on an obstacle. A continuity test with a multimeter is recommended to verify a complete circuit. Prioritize safety throughout this process!
Connecting to Power Source
Before connecting to the power source, absolutely ensure the main breaker supplying power to the garage is switched OFF. This is a critical safety precaution to prevent electrical shock. Locate the opener’s power cord and plug, and carefully connect it to a grounded outlet – typically a 120V outlet.
Avoid using extension cords whenever possible; a direct connection to a wall outlet is always preferable for stability and safety. If an extension cord is unavoidable, use a heavy-duty cord rated for the opener’s amperage.
Once connected, turn the breaker back ON. Observe the opener unit for any signs of malfunction, such as sparks or unusual noises. If anything seems amiss, immediately disconnect power and re-check all wiring. Proceed only when confident in a secure and stable power connection.
Testing the Safety Sensors
Crucially, safety sensors are vital for preventing accidental door closure on obstructions. After wiring, test them thoroughly. Position an object (like a 2×4 piece of wood) directly in the door’s path. Attempt to close the door using the wall button or remote. The door should immediately reverse and reopen.
If the door continues to descend, re-examine the sensor wiring, ensuring correct polarity and secure connections. Verify the sensors are aligned, facing each other, and free from obstructions like dust or debris. Adjust the sensor eyes if necessary, ensuring the beams are unbroken.
Repeat the test several times to confirm consistent operation. A properly functioning safety sensor system is paramount for the safety of people and property. Do not use the opener until this test passes reliably.

Final Adjustments and Testing
Complete the installation by programming remotes, fine-tuning force settings, and conducting a comprehensive operational test for optimal performance and safety assurance.
Programming the Remote Controls
To program your Craftsman remote controls, begin by locating the “Learn” or “Program” button on the garage door opener motor unit – it’s typically yellow or orange. Press and release this button. Within 30 seconds, press and hold the button on your remote control until the garage door opener light flashes, indicating successful programming. Repeat this process for each additional remote control you wish to pair with the system.
If the initial attempt fails, ensure the remote has fresh batteries and try again, moving closer to the motor unit. Some models may require clearing existing codes before adding new ones; consult your specific model’s documentation for details. A properly programmed remote provides convenient and secure access to your garage.
Adjusting the Force Settings
Proper force adjustment is crucial for safe and reliable garage door operation. Locate the force adjustment dials on the garage door opener motor unit – typically labeled “Up” and “Down” travel force. Begin by slightly reducing the force settings; this prevents the door from reversing unnecessarily due to minor obstructions.
Test the door’s operation after each adjustment, ensuring it closes completely without excessive force. If the door reverses, incrementally increase the force until it operates smoothly; Caution: Never set the force so high that it could cause damage or injury. Refer to your model’s manual for specific guidelines and safety recommendations regarding force settings.
Performing a Full Operational Test
After completing all adjustments, conduct a comprehensive operational test. Cycle the garage door multiple times using both the wall-mounted control button and the remote controls. Observe the door’s movement throughout its entire range, checking for any obstructions or unusual noises.
Verify the safety sensors are functioning correctly by placing an object in the door’s path; the door should immediately reverse. Test the door’s response to the safety sensors from various angles. Finally, confirm the lock feature engages and disengages as expected. A thorough test ensures optimal performance and safety before regular use.
Troubleshooting Common Issues
Diagnose and resolve frequent problems like unresponsive openers, unexpected reversals, or remote control failures with our guide, ensuring smooth operation and peace of mind.
Opener Not Responding
If your Craftsman garage door opener fails to respond, begin with the simplest checks. Verify the power supply – ensure the unit is plugged in securely and the circuit breaker hasn’t tripped. Examine the battery in your remote control; a weak battery is a common culprit. Next, inspect the safety sensors located near the floor on either side of the door. These sensors must be aligned and free of obstructions; even a slight misalignment can prevent operation.
Confirm that the wall-mounted control panel is functioning correctly. If it doesn’t illuminate, there may be a wiring issue. Listen for any clicking sounds from the motor unit when attempting to operate it; silence could indicate a motor failure. Finally, check the disconnect switch, usually a red cord hanging from the opener, to ensure it hasn’t been accidentally pulled. If these steps don’t resolve the issue, professional assistance may be required.
Door Reverses Unexpectedly
Unexpected door reversal is often linked to the safety sensors. Double-check their alignment and ensure nothing obstructs the beam – even dust or cobwebs can trigger a reversal. Also, verify the sensors are securely mounted and haven’t been bumped or moved. Next, examine the force settings on your Craftsman opener. If the force is set too low, the opener may interpret slight resistance as an obstruction and reverse direction.
Inspect the garage door itself for binding or obstructions in the tracks. A misaligned track or stiff hinges can cause the door to struggle, leading to reversals. Ensure the door is properly balanced (refer to the ‘Checking Garage Door Balance’ section). Finally, a faulty safety sensor or logic board could be the cause; in such cases, professional diagnosis and repair are recommended to ensure safe operation.
Remote Control Not Working
A non-responsive remote often stems from a simple issue: depleted batteries. Replace them with fresh ones and retest. If that doesn’t resolve the problem, the remote may need reprogramming to the garage door opener unit. Consult the ‘Programming the Remote Controls’ section for detailed instructions on establishing a connection. Interference from other devices can also disrupt the signal; try moving potential sources of interference, like wireless routers or other radio transmitters, away from the opener.
If reprogramming fails, the receiver in the opener unit might be faulty. Inspect the antenna wire connected to the receiver – ensure it’s securely attached and undamaged. A damaged antenna can significantly reduce the remote’s range. Consider testing with a known working remote to isolate whether the issue lies with the remote itself or the opener unit.