
Singer Touch and Sew Manual: A Comprehensive Guide
This guide offers detailed instructions for the Singer Touch and Sew series‚ providing access to PDF manuals and parts lists for models like 603‚ 67A‚ 758‚ and 630․
The Singer Touch and Sew machines represent a pivotal era in home sewing technology‚ designed with user-friendliness and safety as core principles․ Introduced to simplify the sewing experience‚ these machines quickly gained popularity among both novice and experienced sewers․ This series‚ including models like the Little Touch and Sew 67A and the Golden Touch and Sew‚ offered innovative features for their time․
Understanding the original intent behind the Touch and Sew line – to make sewing accessible – is crucial for appreciating its design․ These machines were built to be reliable and straightforward‚ offering a blend of mechanical precision and ease of operation․ This introduction sets the stage for a deeper dive into the specifics of operation and maintenance․
Historical Context of the Touch and Sew Series
The Singer Touch and Sew series emerged during a period of significant growth in the home sewing market․ Introduced to cater to a rising demand for convenient and accessible sewing solutions‚ these machines represented Singer’s commitment to innovation․ The series aimed to democratize sewing‚ making it easier for a wider audience to create and repair garments at home․
The “Touch and Sew” name itself highlights the series’ focus on simplified operation․ These machines were designed to be intuitive‚ even for beginners․ They filled a gap in the market by offering features previously found only on more complex‚ industrial machines‚ packaged in a user-friendly format․ This historical context is vital for understanding the machine’s design philosophy․
Key Features and Innovations
The Singer Touch and Sew machines boasted several innovative features for their time‚ notably the simplified stitch selection dials and the emphasis on ease of use․ The buttonhole mechanism was a significant advancement‚ automating a traditionally challenging sewing task․ These machines incorporated features like adjustable stitch length and width‚ offering versatility for various fabrics and projects․
Furthermore‚ the series prioritized user-friendliness with clear labeling and intuitive controls․ The design focused on making sewing accessible to both novice and experienced users․ These innovations cemented the Touch and Sew’s place as a popular choice‚ blending functionality with a streamlined user experience․

Understanding Your Machine: Parts and Functions
Explore the principal components‚ including the buttonhole mechanism and feed control‚ essential for operating your Singer Touch and Sew effectively and understanding its capabilities․
Principal Parts of the Touch and Sew
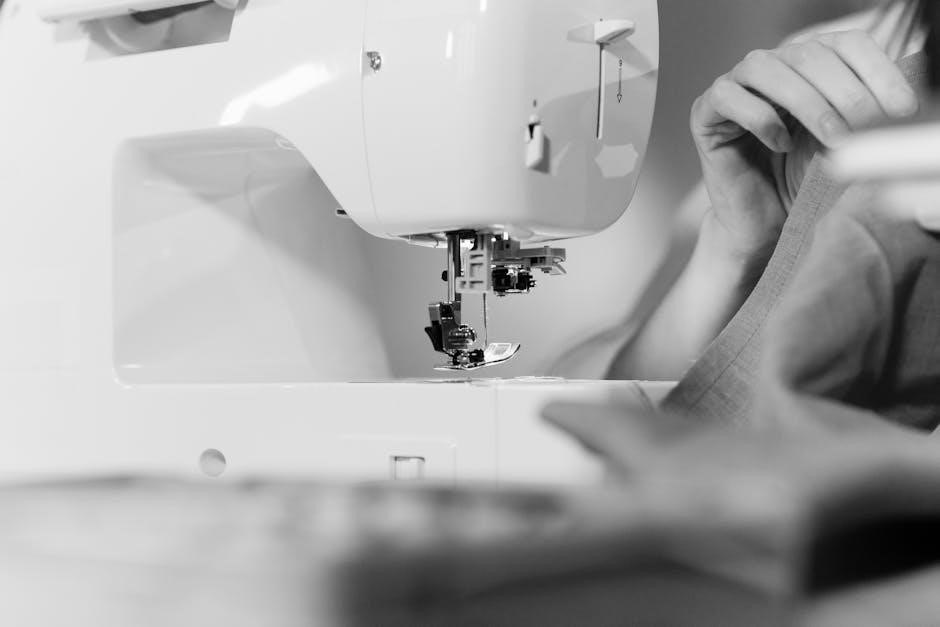
The Singer Touch and Sew machines‚ renowned for their innovative design‚ feature several key components crucial for operation․ These include the handwheel‚ used for manual control‚ and the presser foot‚ which secures fabric during stitching․ The feed dogs advance the material‚ ensuring consistent seam allowance․
Understanding the bobbin case and its interaction with the shuttle hook is vital for proper stitch formation․ The tension discs regulate thread flow‚ impacting stitch quality․ The stitch length dial allows for adjustments‚ while the stitch width control governs zigzag patterns․
Furthermore‚ the machine incorporates a feed cam follower lever and hinge stud‚ essential for the feed control mechanism․ Familiarizing yourself with these parts‚ as detailed in the instruction manual‚ will greatly enhance your sewing experience and maintenance capabilities․
The Buttonhole Mechanism
The Touch and Sew machines boast a remarkably streamlined buttonhole mechanism‚ a significant innovation for its time․ This system utilizes a specialized buttonhole foot and a series of precisely engineered components to create consistent‚ professional-looking buttonholes․ The mechanism involves a unique interplay between the feed dogs‚ the shuttle hook‚ and a dedicated buttonhole cam․
Proper alignment and adjustment of these parts‚ as outlined in the instruction manual‚ are crucial for achieving optimal results․ Understanding the sequence of operations – from initiating the buttonhole stitch to completing the bartacking – is key․ The buttonhole mechanism’s efficiency simplifies a traditionally complex sewing task․
Feed Control and Stitch Regulation
Precise feed control is fundamental to the Singer Touch and Sew’s performance‚ ensuring even fabric advancement during stitching․ The machine features adjustable feed dogs‚ allowing users to modify the stitch length and adapt to various fabric types․ Stitch regulation is primarily managed through the stitch length dial and tension settings‚ detailed within the manual․
Understanding how these controls interact is vital for achieving consistent stitch quality․ The feed cam follower lever plays a role in this process․ Correct tension prevents puckering or looping‚ while appropriate stitch length secures seams effectively․ Mastering these adjustments unlocks the machine’s full potential․
Setting Up Your Singer Touch and Sew
Proper setup involves threading the machine correctly‚ winding the bobbin efficiently‚ and selecting desired stitch patterns—all detailed within the comprehensive instruction manual․
Threading the Machine
Successfully threading your Singer Touch and Sew is fundamental to its operation․ The instruction manual provides clear diagrams illustrating the precise path the thread must follow‚ starting from the spool pin and guiding it through various tension discs and take-up levers․
Ensure the presser foot is raised during threading‚ as this opens the tension plates‚ allowing the thread to seat correctly․ Incorrect threading is a common cause of sewing issues‚ leading to skipped stitches or thread breakage․
Pay close attention to each step‚ verifying the thread is securely positioned in every guide․ The manual emphasizes the importance of using the correct type of thread for your fabric to achieve optimal results․ Following these guidelines will ensure smooth and reliable sewing performance․
Winding the Bobbin
Proper bobbin winding is crucial for consistent stitch quality on your Singer Touch and Sew machine․ The manual details a straightforward process‚ beginning with placing the spool of thread onto the spool pin and guiding it through the thread guides specifically designated for bobbin winding․
Next‚ thread the end of the thread through the bobbin‚ ensuring it’s securely attached․ Engage the bobbin winding mechanism‚ typically by sliding a lever or pressing a button‚ and begin winding by gently pressing the foot pedal․
The manual stresses the importance of not overfilling the bobbin‚ as this can cause issues during sewing․ Once full‚ the machine will automatically stop․ A correctly wound bobbin ensures even tension and prevents thread nests․
Selecting Stitch Patterns
The Singer Touch and Sew machines offer a variety of stitch patterns‚ easily selected using the dial or buttons on the machine’s faceplate‚ as detailed in the manual․ The manual illustrates how to align the desired stitch pattern with the indicator mark․

Common stitches include straight stitch‚ zigzag stitch‚ and various decorative options․ The manual provides diagrams showing each stitch’s appearance and recommended uses․ Adjustments for stitch length and width are also explained‚ allowing for customization․
Understanding the stitch selection process is key to achieving the desired results for different fabrics and sewing projects․ Refer to the manual for specific guidance on choosing the appropriate stitch for your needs․

Basic Sewing Techniques
Master essential skills like straight and zigzag stitching‚ alongside buttonhole creation‚ using your Singer Touch and Sew – detailed instructions are within the manual․
Straight Stitching
Achieving a perfect straight stitch with your Singer Touch and Sew is fundamental to many sewing projects․ Begin by threading the machine correctly‚ ensuring the presser foot is down‚ and selecting the appropriate stitch length on the dial․ Practice on scrap fabric first to gauge tension and stitch appearance․
Consistent fabric feed is crucial; guide the material gently‚ avoiding pulling or pushing․ The manual details adjusting the feed control for various fabric weights․ For longer seams‚ maintain a steady rhythm and use a seam guide for accuracy․ Remember to backstitch at the beginning and end of each seam to secure the stitches‚ preventing unraveling․ Proper needle selection‚ as outlined in your manual‚ also impacts stitch quality․
Zigzag Stitching
The Singer Touch and Sew’s zigzag stitch offers versatility for finishing raw edges‚ creating decorative elements‚ and sewing stretch fabrics․ Select the zigzag stitch pattern using the dial‚ and adjust the width and length according to your project needs – consult your manual for recommended settings․ Practice on scrap fabric to understand the stitch’s behavior․
For edge finishing‚ a narrow zigzag prevents fraying․ Wider zigzag stitches are ideal for decorative applications or when sewing knits‚ allowing for fabric stretch․ Ensure consistent fabric feed and guide the material gently․ The manual illustrates adjusting the tension for optimal zigzag stitch formation‚ preventing puckering or looping․ Proper needle choice is also vital for successful zigzag sewing․
Buttonhole Creation
The Singer Touch and Sew machines feature an automated buttonhole mechanism‚ simplifying this traditionally challenging task․ Begin by selecting the buttonhole setting on the stitch dial․ Attach the appropriate buttonhole foot‚ as detailed in your machine’s manual․ Position the fabric‚ aligning the buttonhole placement with the designated markings on the needle plate․
The machine will automatically stitch the buttonhole outline․ Carefully monitor the process‚ ensuring even fabric feed․ After completion‚ reinforce the ends of the buttonhole by backstitching․ Refer to your manual for specific instructions related to your model (603‚ 67A‚ 758‚ 630) as procedures may vary slightly․ Practice on scrap fabric to master the technique․

Troubleshooting Common Issues
This section addresses frequent problems like needle malfunctions‚ tension inconsistencies‚ and motor difficulties‚ offering solutions found within the Singer Touch and Sew manuals․
Needle Problems
Encountering needle issues is common with vintage machines․ If the needle breaks frequently‚ ensure you’re using the correct type and size for your fabric weight – consult your manual! A bent or damaged needle must be replaced immediately to prevent further machine damage and ensure stitch quality․
Threading errors are a primary cause of needle problems; re-thread the machine carefully‚ following the diagram in the instruction manual․ Also‚ verify the needle is fully inserted and securely tightened․ If the needle jams‚ stop immediately and gently remove the fabric․ Check for lint buildup around the needle plate‚ as this can hinder smooth operation․ Regularly cleaning this area‚ as detailed in the maintenance section‚ is crucial․
Tension Issues
Incorrect tension is a frequent issue with the Singer Touch and Sew․ Loops forming on the underside of the fabric indicate loose upper tension; tighten the upper tension dial incrementally; Conversely‚ puckering or breakage suggests overly tight upper tension – loosen the dial slightly․ Always test adjustments on scrap fabric before sewing your project․
Bobbin tension also plays a vital role․ While generally pre-set‚ it may require adjustment․ Consult your manual for specific instructions on adjusting bobbin tension․ Ensure the bobbin is wound evenly and inserted correctly․ Lint accumulation in the bobbin case can disrupt tension‚ so regular cleaning is essential․ Proper tension balance ensures even‚ professional-looking stitches․
Motor and Power Concerns
If your Singer Touch and Sew fails to power on‚ first verify the power cord is securely connected to both the machine and a functioning outlet․ Check the foot controller connection as well․ A blown fuse within the machine is a common culprit; consult your manual for fuse location and replacement instructions – always use the correct amperage fuse․
If the motor runs but the machine doesn’t sew‚ internal issues may exist․ Avoid attempting repairs yourself if you’re not experienced․ A sluggish motor could indicate a need for cleaning and lubrication․ Never force the machine; this can cause further damage․ Professional servicing is recommended for complex motor problems․

Finding and Downloading Manuals
Access free PDF manuals instantly for Singer‚ Pfaff‚ and Husqvarna Viking sewing machines‚ including setup‚ maintenance‚ and troubleshooting guides for various models․
Accessing Free PDF Manuals Online
Locating a replacement manual for your Singer Touch and Sew machine is now remarkably easy thanks to the wealth of resources available online․ Numerous websites specialize in archiving and distributing free PDF manuals for vintage sewing machines‚ including the popular Touch and Sew series․
These online repositories often categorize manuals by model number – such as the 603‚ 67A‚ 758‚ or 630 – simplifying the search process․ A quick internet search using terms like “Singer Touch and Sew manual PDF” or “Singer [model number] manual download” will yield a multitude of results․
Users can instantly download and view these manuals‚ providing immediate access to essential information regarding machine operation‚ maintenance‚ and troubleshooting․ This convenience eliminates the need to purchase a physical copy‚ saving both time and money․
Singer’s Official Manual Resources
While numerous third-party websites offer Singer Touch and Sew manuals‚ exploring Singer’s official resources is also highly recommended․ Although older models like the 603‚ 67A‚ 758‚ and 630 may not have dedicated pages on the current Singer website‚ historical documentation is sometimes available through their support channels․
Singer often provides assistance in locating manuals or offers guidance on compatible replacement parts․ Checking their official forums or contacting customer support directly can be beneficial․ Furthermore‚ Singer occasionally releases digitized versions of classic manuals as part of their heritage preservation efforts․
These official resources ensure the accuracy and authenticity of the information‚ providing users with reliable guidance for maintaining and operating their vintage Touch and Sew machines․
Locating Manuals for Specific Models (603‚ 67A‚ 758‚ 630)
Finding manuals for specific Singer Touch and Sew models – 603‚ 67A‚ 758‚ and 630 – often requires utilizing online archives and dedicated sewing machine resources․ Many websites offer free PDF downloads of these instruction manuals‚ providing detailed guidance on operation‚ threading‚ and maintenance․
Searching with the precise model number is crucial for accurate results․ Resources frequently include parts lists and troubleshooting guides specific to each machine․ The Little Touch and Sew 67A‚ for example‚ has readily available manuals online․ Similarly‚ the 603 and 758 models are well-documented․
Model 630 instructions‚ often composed of images and text‚ can also be found through diligent searching․

Maintenance and Care
Regular cleaning and oiling are essential for your Singer Touch and Sew․ Proper care ensures longevity and optimal performance‚ even during long-term storage․
Cleaning Your Singer Touch and Sew
Maintaining a clean sewing machine is paramount for smooth operation and preventing malfunctions․ Begin by disconnecting the power source before any cleaning procedures․ Use a soft brush to remove lint and dust from the bobbin area‚ feed dogs‚ and surrounding components․ A small vacuum cleaner attachment can also be helpful for reaching tight spaces․
Wipe down the exterior surfaces with a slightly damp cloth; avoid harsh chemicals or abrasive cleaners․ Pay attention to areas where oil may accumulate․ For stubborn grime‚ a specialized sewing machine cleaner can be used sparingly․ Regularly cleaning prevents fabric residue buildup‚ ensuring consistent stitch quality and extending the life of your Singer Touch and Sew machine․
Oiling and Lubrication
Proper lubrication is crucial for the longevity and performance of your Singer Touch and Sew machine․ Refer to your specific model’s manual for designated oiling points – typically found in the bobbin area‚ gears‚ and moving parts․ Use only sewing machine oil; other lubricants can cause damage․
Apply oil sparingly‚ a drop at a time‚ and work the machine by hand to distribute it evenly․ Avoid over-oiling‚ as excess oil attracts dust and lint․ Regular oiling – every few months with moderate use – ensures smooth operation and prevents wear and tear․ Always disconnect the power before oiling‚ and wipe away any excess oil with a clean cloth;
Long-Term Storage
Preparing your Singer Touch and Sew for extended storage requires careful attention to prevent damage․ Begin by thoroughly cleaning the machine‚ removing all lint‚ dust‚ and old thread․ Lightly oil all designated lubrication points as outlined in the manual to protect metal components from rust․
Cover the machine with a dust cover or place it in a protective case․ Store it in a cool‚ dry environment‚ away from direct sunlight and extreme temperatures․ Avoid storing it in damp basements or attics․ Before reconnecting after storage‚ re-oil if necessary and test its operation to ensure everything functions smoothly․